介绍
前置知识点
- Spring
- Spring MVC
知识点
- Spring Boot 配置文件
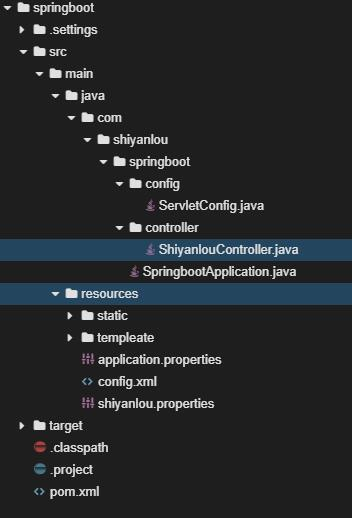
目录结构

代码获取
wget https://labfile.oss.aliyuncs.com/courses/1152/springbootshiyan3.zip
application.properties 配置文件
在上一个实验的 采用 Spring Initializr 搭建(在线环境网络限制,无法操作) 小节中,可以看到官方提供的压缩包中的 src/main/resources 目录下有一个 application.properties 配置文件(如果没有就手动创建一个),这就是 Spring Boot 默认的配置文件,可以对其进行更改来修改 Spring Boot 的配置。在修改之前,首先需要知道 properties 文件的格式。properties 文件的内容都是以键值对的形式出现:键 = 值。比如要修改 Spring Boot 的端口,那么就在配置文件中填写:
#端口
server.port = 8080
注意:在实验楼提供的环境中,只有 8080 端口才对外开发,并且访问时会隐藏 8080 端口,所以在环境中我们只能通过控制台输出观察,地址栏是观察不到的。properties 文件中注释使用 # 开头。
#端口
server.port = 8080
properties 文件中每个属性占有一行。
properties 中除了填写 Spring Boot 的配置信息外也可以自定义属性,比如在其中添加:
#端口
server.port = 8080
shiyanlou.springboot = Hello_shiyanlou
shiyanlou.springboot 是自定义的属性,那么如何在 Spring Boot 中使用它们呢?打开 ShiyanlouController.java,修改为下面的代码:
package com.shiyanlou.springboot.controller;

import org.springframework.beans.factory.annotation.Value;
import org.springframework.web.bind.annotation.RequestMapping;
import org.springframework.web.bind.annotation.RestController;

@RestController
public class ShiyanlouController{
// 使用 @Value 注解注入属性值
  @Value("${shiyanlou.springboot}")
  private String shiyanlou;

  @RequestMapping("shiyanlou")
  public String shiyanlou(){
    return shiyanlou;
  }
}
然后重新运行项目 mvn spring-boot:run,依旧访问路径 https://**************.simplelab.cn/shiyanlou,如果得到下图的画面,就说明成功的访问了自定义属性。

注意: 这里只能访问
application.properties中的属性,其他自定义的配置文件中的属性是访问不到的,还需要其他的处理。
首先在 src/main/resources 目录下建立 shiyanlou.properties 文件,内容为:
shiyanlou.test = test_shiyanlou
修改 ShiyanlouController.java:
package com.shiyanlou.springboot.controller;

import org.springframework.beans.factory.annotation.Value;
import org.springframework.context.annotation.Configuration;
import org.springframework.context.annotation.PropertySource;
import org.springframework.web.bind.annotation.RequestMapping;
import org.springframework.web.bind.annotation.RestController;

@RestController
// 加载 classpath 目录下的 shiyanlou.properties 文件
@PropertySource(value = "classpath:shiyanlou.properties")
public class ShiyanlouController{

  @Value("${shiyanlou.test}")
  private String shiyanlou;

  @RequestMapping("shiyanlou")
  public String shiyanlou(){
    return shiyanlou;
  }
}
再次运行程序,可以看到:

说明加载自定义配置文件成功了。
Spirng Boot Java 配置
Spring Boot 除了可以使用 application.properties 配置之外,也可以使用 Java 来自定义配置,就比如在 application.properties 配置文件 节中说到的修改访问端口为 8080,也可以通过 Java 代码来实现。
建立包 com.shiyanlou.springboot.config,在包目录下建立 ServletConfig.java。
package com.shiyanlou.springboot.config;

import org.springframework.boot.web.server.WebServerFactoryCustomizer;
import org.springframework.boot.web.servlet.server.ConfigurableServletWebServerFactory;
import org.springframework.context.annotation.Configuration;

// @Configuration 表示该类为配置类,该注解可以被 @ComponentScan 扫描到
@Configuration
public class ServletConfig implements WebServerFactoryCustomizer<ConfigurableServletWebServerFactory>{
  @Override
  public void customize(ConfigurableServletWebServerFactory factory){
    // 设置端口为 8080
    factory.setPort(8080);
  }
}
然后将 application.properties 中的 server.port = 8080 注释掉:
#端口
#server.port = 8080
shiyanlou.springboot = Hello_shiyanlou
然后启动程序,如果出现 test_shiyanlou 那么就说明成功的通过 java 代码修改了 Spring Boot 的配置。

注意:这是 Spring Boot 2.x 通过 Java 代码修改内嵌容器端口的方式,如果是使用 Spring Boot 1.x 这个方法就行不通了,Spring Boot 1.x 是通过实现
EmbeddedServletContainerCustomizer接口来修改。
Spring Boot xml 配置
Spring Boot 已经不推荐使用 xml 作为配置方式,如果一定要使用,可以通过 @ImportResource 注解来完成。 首先注释掉 ServletConfig.java 中的 @Configuration:
package com.shiyanlou.springboot.config;

import org.springframework.boot.web.server.WebServerFactoryCustomizer;
import org.springframework.boot.web.servlet.server.ConfigurableServletWebServerFactory;
import org.springframework.context.annotation.Configuration;


//@Configuration
public class ServletConfig implements WebServerFactoryCustomizer<ConfigurableServletWebServerFactory>{
  @Override
  public void customize(ConfigurableServletWebServerFactory factory){
    // 设置端口
    factory.setPort(8080);
  }
}
现在启动项目,在启动日志中可以看到端口已经回到了默认端口 8080。
2018-08-29 14:56:09.384 INFO 48712 — [main] o.s.b.w.embedded.tomcat.TomcatWebServer: Tomcat started on port(s): 8080 (http) with context path
接着在 src/main/resources/ 中建立 xml 文件 config.xml:
<?xml version="1.0" encoding="UTF-8"?>
<beans xmlns="http://www.springframework.org/schema/beans"
       xmlns:xsi="http://www.w3.org/2001/XMLSchema-instance"
       xsi:schemaLocation="http://www.springframework.org/schema/beans http://www.springframework.org/schema/beans/spring-beans.xsd">

    <bean id="servletConfig" class="com.shiyanlou.springboot.config.ServletConfig"/>

</beans>
然后在 SpringbootApplication.java 修改为如下形式:
package com.shiyanlou.springboot;

import org.springframework.boot.SpringApplication;
import org.springframework.boot.autoconfigure.SpringBootApplication;
import org.springframework.context.annotation.ImportResource;

// 通过 @ImportResource 加载 xml 配置文件
@ImportResource(value = "classpath:config.xml")
@SpringBootApplication
public class SpringbootApplication{

    public static void main(String[] args){
        SpringApplication.run(SpringbootApplication.class, args);
    }
}
接着重启项目,如果可以成功访问,那么说明成功的导入了 xml 配置。
创建 Maven 工程
首先打开 Web IDE,在终端中输入以下内容,创建一个 Maven 工程。
mvn archetype:generate \
  -DgroupId=com.example.config \
  -DartifactId=spring-boot-config \
  -DarchetypeArtifactId=maven-archetype-quickstart \
  -DinteractiveMode=false
接着建立目录 src/main/resources ,在该目录下新建配置文件 application.properties。这里不需要单元测试,所以将 src/test 目录删除。
之后选择 File → Open Workspace 切换工作空间,选择 spring-boot-config 目录,必须切换到该目录下,否则识别不了项目。
接着打开 pom.xml 文件,向该文件中添加项目依赖。
<?xml version="1.0" encoding="UTF-8"?>
<project xmlns="http://maven.apache.org/POM/4.0.0" xmlns:xsi="http://www.w3.org/2001/XMLSchema-instance"
    xsi:schemaLocation="http://maven.apache.org/POM/4.0.0 http://maven.apache.org/xsd/maven-4.0.0.xsd">
    <modelVersion>4.0.0</modelVersion>

    <groupId>com.example</groupId>
    <artifactId>spring-boot-config</artifactId>
    <version>0.0.1-SNAPSHOT</version>
    <packaging>jar</packaging>


    <parent>
        <groupId>org.springframework.boot</groupId>
        <artifactId>spring-boot-starter-parent</artifactId>
        <version>2.2.2.RELEASE</version>
        <relativePath/>
    </parent>

    <properties>
        <project.build.sourceEncoding>UTF-8</project.build.sourceEncoding>
        <project.reporting.outputEncoding>UTF-8</project.reporting.outputEncoding>
        <java.version>1.8</java.version>
    </properties>

    <dependencies>
    <!--添加web依赖-->
        <dependency>
            <groupId>org.springframework.boot</groupId>
            <artifactId>spring-boot-starter-web</artifactId>
        </dependency>
    </dependencies>

    <build>
        <plugins>
        <!--spring Boot maven插件-->
            <plugin>
                <groupId>org.springframework.boot</groupId>
                <artifactId>spring-boot-maven-plugin</artifactId>
            </plugin>
        </plugins>
    </build>

</project>
打开 App.java 文件,向文件中添加主程序内容。
package com.example.config;

import org.springframework.boot.SpringApplication;
import org.springframework.boot.autoconfigure.SpringBootApplication;
@SpringBootApplication
public class App {

    public static void main(String[] args) {
        SpringApplication.run(App.class, args);
    }

}
接下来,我们在 src/main/java 目录中创建包,包名为 com.example.config.bean 和 com.example.config.controller 。添加包就是添加文件夹,点击 File → New Folder,在 src/main/java/com/example/config 目录下新建 bean 文件夹和 controller 文件夹。
配置基础
在 Spring Boot 中,默认配置文件位于 src/main/resources 目录下,支持两种类型的配置文件,文件名为 application.properties 或 application.yml 。配置文件的作用为修改默认的配置值或者自定义参数值。
下面分别演示两种类型的配置文件的基本语法:
Properties 文件是 Java 中常用的一种配置文件,文件后缀为“.properties”。文件的内容格式为“键=值”的格式,在注释内容前加“#”作为注释。
例如,当使用 Properties 文件配置数据库的连接信息时,内容如下:
# 数据库配置信息
driver=com.mysql.jdbc.Driver
jdbcUrl=jdbc:mysql://localhost:3306/user
user=root
password=123456
Spring Boot 的配置文件除了可以使用传统的 Properties 文件之外,还支持现在被广泛推荐使用的 YAML 文件。YAML 文件是一种以数据为中心的标记语言,文件后缀为“.yml”。以空格的缩进来表示层级关系,只要是左对齐的数据,都是同一个层级的,需要注意的一点是,YAML 不可使用 Tab 键进行缩进。
键值对的基本语法为 k:(空格)v(空格必须有),当使用 YAML 表示上方的数据库配置信息时,如下所示:
# 数据库配置信息(键值对中间有一个空格)
driver: com.mysql.jdbc.Driver
jdbcUrl: jdbc:mysql://localhost:3306/user
user: root
password: 123456
在 YAML 中,连续的项目例如数组元素,集合元素通过减号(“-”)来表示,Map 结构里的键值对(“key:value")用冒号”:“来分割。
person:
  name: xiaoming
  age: 20
  friends:
    # List结构
    - xiaowang
    - xiaohong
  dog:
    # Map结构
    name: xiaogou
    age: 2
YAML 也提供了数组、集合和 Map 结构的行内写法。数组用“[]”包括起来,Map 用“{}”包括起来。
person:
  name: xiaoming
  age: 20
  friends: [xiaoming, xiaohong]
  dog: { name: xiaogou, age: 2 }
配置注入
在介绍了配置文件的基本语法后,接着学习如何读取配置文件中的值。在读取配置文件值的时候有两种方式,分别为单值注入和批量注入。
单值注入
我们新建一个课程类(Course),包含两个属性分别为课程 ID(courseId)和课程名称(courseName)。接着采用 @Value 注解的方式将配置文件的值注入到属性中。
在 src/main/java/com/example/config/bean 目录下新建 Course.java 文件。输入以下内容到文件中。
package com.example.config.bean;

import org.springframework.beans.factory.annotation.Value;
import org.springframework.stereotype.Component;
// @Component:将组件扫描到容器中
@Component
public class Course {
    @Value("${course.id}")
    private int courseId;
    @Value("${course.name}")
    private String courseName;

    public int getCourseId() {
        return courseId;
    }

    public void setCourseId(int courseId) {
        this.courseId = courseId;
    }

    public String getCourseName() {
        return courseName;
    }

    public void setCourseName(String courseName) {
        this.courseName = courseName;
    }

    @Override
    public String toString() {
        return "Course{" +
                "courseId=" + courseId +
                ", courseName='" + courseName + '\'' +
                '}';
    }
}
单个读取配置文件的值只需要在相应的字段前加 @Value("${属性名"} 。
接着在 src/main/java/com/example/config/controller 目录下新建 CourseController.java 文件。添加以下内容到文件中。
package com.example.config.controller;

import com.example.config.bean.Course;
import org.springframework.beans.factory.annotation.Autowired;
import org.springframework.web.bind.annotation.RequestMapping;
import org.springframework.web.bind.annotation.RestController;

@RestController
public class CourseController {
    @Autowired
    private Course course;

    @RequestMapping(value = "/course")
    public String getCourse() {
        return course.toString();
    }
}
以上代码中相关注解的作用解析:
@RestController:集合了@Controller注解和@RequestBody注解。表示该注解标识的类为一个控制器,且该类的所有方法的返回值都转换为 JSON 格式,同时将返回值写入到 Response 对象的 body 中。@RequestMapping("/course"):“/course” 路径的 HTTP 请求都将映射到该方法进行处理。
在 application.properties 中自定义一组属性。
course.id=1
course.name=java
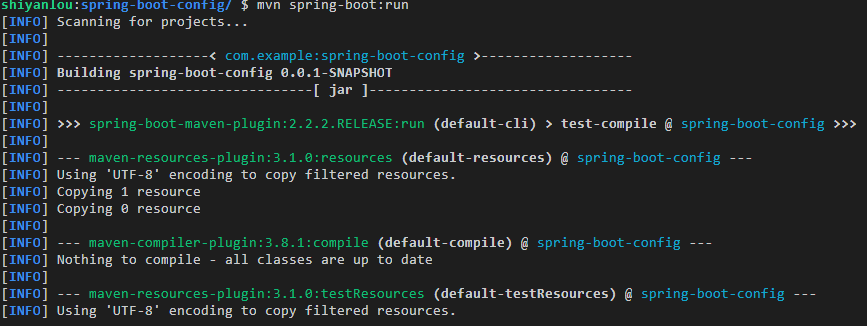
在终端上执行如下命令,运用插件编译并执行程序。注:需在之前将工作空间切换到该项目目录下。
mvn spring-boot:run
执行后结果如下图所示:

点击后,会在浏览器中打开一个网页,此时网址类似于 https://**************.simplelab.cn 。在地址栏后添加请求地址 /course ,回车访问新地址,将会打印出课程相关的信息。从下图可以看出,Course 类已经从配置文件中读到了课程 ID(courseId)和课程名称(courseName)的属性值。

批量注入
针对单个或几个属性值时可以采用 @Value 注解的方式。当我们有很多属性需要配置的时候,可以将这些属性封装为一个 JavaBean,利用 @ConfigurationProperties 注解进行属性的批量注入。
首先,创建一个 JavaBean,该类是一个用户类,包含用户 ID,用户昵称,用户级别,用户累计实验时间等属性。
在 src/main/java/com/example/config/bean 目录下新建 User.java 文件。输入以下内容到文件中。
package com.example.config.bean;

import org.springframework.boot.context.properties.ConfigurationProperties;
import org.springframework.stereotype.Component;

@Component
@ConfigurationProperties(prefix = "user")
public class User {
    // 用户id
    private Integer id;
    // 用户昵称
    private String userName;
    // 用户级别
    private Integer level;
    // 总的学习时间
    private Integer totalTime;

    public Integer getId() {
        return id;
    }

    public void setId(Integer id) {
        this.id = id;
    }

    public String getUserName() {
        return userName;
    }

    public void setUserName(String userName) {
        this.userName = userName;
    }

    public Integer getLevel() {
        return level;
    }

    public void setLevel(Integer level) {
        this.level = level;
    }

    public Integer getTotalTime() {
        return totalTime;
    }

    public void setTotalTime(Integer totalTime) {
        this.totalTime = totalTime;
    }

    @Override
    public String toString() {
        return "User{" +
                "id=" + id +
                ", userName='" + userName + '\'' +
                ", level=" + level +
                ", totalTime=" + totalTime +
                '}';
    }
}
在批量值注入时,需要使用 @ConfigurationProperties(prefix = "user") 注解。该注解是将配置文件中以 user 为前缀的属性值自动绑定到对应的字段中,该注解默认从全局配置文件中获取属性值。 只有这个组件是容器中的组件,才能提供 @ConfigurationProperties 功能,所以需要标注 @Component。
接着在 src/main/java/com/example/config/controller 目录下新建 UserController.java 文件。输入以下内容到文件中。
package com.example.config.controller;

import com.example.config.bean.User;
import org.springframework.beans.factory.annotation.Autowired;
import org.springframework.web.bind.annotation.RequestMapping;
import org.springframework.web.bind.annotation.RestController;

@RestController
public class UserController {
    @Autowired
    private User user;

    @RequestMapping(value = "/user")
    public String getUser() {
        return user.toString();
    }
}
在 application.properties 中追加一组属性值。
user.id=1
user.userName=${user.id}-shiyanlou
user.level=100
user.totalTime=${random.int(1000)}
在配置文件中,参数间是可以互相引用的,可以直接通过使用 ${ } 的方式来进行引用,就像上面配置中 user.userName 引用 user.id 一样。其次,在配置文件中也用到了 ${random},它可以用来产生随机的 Int 值、Long 值或者 String 字符串。
${random.value}  #随机字符串
${random.int} #随机int
${random.long} #随机long
${random.int(10)} #10以内的随机数
${random.int[10,20]} #10-20的随机数
在终端上执行如下命令,运用插件编译并执行程序。
mvn spring-boot:run
点击后,会在浏览器中打开一个网页,此时网址类似于 https://**************.simplelab.cn 。在地址栏后添加请求地址 /user ,回车访问新地址,将会打印出用户的相关信息。从下图可以看出,User 类已经从配置文件中批量获取到了相关的属性值。

在本实验中,我们演示的都是 Properties 文件类型的配置,YAML 格式的配置是类似的。你可以删除掉 application.properties 文件,新建一个 application.yml 文件,复制下面的内容,运行一下程序,看一下运行效果(注意:不要使用 Tab 键进行缩进)。
course:
  id: 1
  name: java
user:
  id: 2
  userName: ${user.id}-shiyanlou
  level: 2
  totalTime: ${random.int(1000)}
自定义配置文件
在上面配置属性时,我们都将配置内容写到了默认的 application.properties 文件中,有时候由于配置项繁多,不愿意将所有配置项都写到默认的配置文件中,这时可以选择自定义配置文件。自定义配置文件后,与之前从默认配置文件读取属性唯一不同的地方是,需要在 JavaBean 之前加上一个 @PropertySource 注解来标识配置文件的位置。
接下来我们自定义一个配置文件来配置 User 类的属性。在 src/main/resources 目录下新建 user.properties 文件,添加以下配置内容到文件中。

user.id=1
user.userName=user.properties
user.level=100
user.totalTime=${random.int(1000)}
此时,需要将默认配置文件 application.properties ,与 User 相关的配置项注释掉,否则会看不到自定义配置的效果。在实验楼的 WebIDE 环境中,选中要注释的内容,按 Crtl+/ 组合键即可将选定内容注释掉。
在 Spring Boot 中,有特定的属性配置加载顺序(了解即可)。
- 命令行中传入的参数。
SPRING_APPLICATION_JSON中的属性。SPRING_APPLICATION_JSON是以 JSON 格式配置在系统环境变量中的内容。java:comp/env中的JNDI属性。- Java 的系统属性,可以通过
System.getProperties()获得的内容。 - 操作系统的环境变量。
- 通过
random.*配置的随机属性。 - 位于当前应用 jar 包之外,针对不同
{profile}环境的配置文件内容,例如:application-{profile}.properties或是YAML定义的配置文件。 - 位于当前应用 jar 包之内,针对不同
{profile}环境的配置文件内容,例如:application-{profile}.properties或是YAML定义的配置文件。 - 位于当前应用 jar 包之外的
application.properties和YAML配置内容。 - 位于当前应用 jar 包之内的
application.properties和YAML配置内容。 - 在
@Configuration注解修改的类中,通过@PropertySource注解定义的属性。 - 应用默认属性,使用
SpringApplication.setDefaultProperties定义的内容。
优先级按上面的顺序由高到低,数字越小优先级越高,高优先级的配置会覆盖低优先级的配置,所有的配置会形成互补配置。
由上可以看出,默认配置文件的优先级为 9,@PropertySource 所标识的配置文件优先级为 10,所以需要将默认配置项中的内容注释掉,否则会覆盖 @PropertySource 所标识的配置文件内容。
接着,修改 src/main/java/com/example/config/bean 目录下的 User.java 文件。只需要在 User 类前 添加一个 @PropertySource 注解来标识配置文件的位置,同时记得导入该注解所在的包。为了方便,提供了修改后文件内容,你可以直接复制粘贴。
package com.example.config.bean;

import org.springframework.boot.context.properties.ConfigurationProperties;
import org.springframework.context.annotation.PropertySource;
// 导包
import org.springframework.stereotype.Component;

@Component
@ConfigurationProperties(prefix = "user")
// 指定配置文件位置
@PropertySource(value = "classpath:user.properties")
public class User {
    // 用户id
    private Integer id;
    // 用户昵称
    private String userName;
    // 用户级别
    private Integer level;
    // 总的学习时间
    private Integer totalTime;

    public Integer getId() {
        return id;
    }

    public void setId(Integer id) {
        this.id = id;
    }

    public String getUserName() {
        return userName;
    }

    public void setUserName(String userName) {
        this.userName = userName;
    }

    public Integer getLevel() {
        return level;
    }

    public void setLevel(Integer level) {
        this.level = level;
    }

    public Integer getTotalTime() {
        return totalTime;
    }

    public void setTotalTime(Integer totalTime) {
        this.totalTime = totalTime;
    }

    @Override
    public String toString() {
        return "User{" +
                "id=" + id +
                ", userName='" + userName + '\'' +
                ", level=" + level +
                ", totalTime=" + totalTime +
                '}';
    }
}
修改完成后在终端上执行如下命令,运用插件编译并执行程序。
mvn spring-boot:run
编译运行后,需要通过实验楼内部环境的「 Web 服务」,进入到相应的页面验证实验结果。打开右侧的工具栏,点击「 Web 服务」。点击后,会在浏览器中打开一个网页,网址类似于 https://**************.simplelab.cn 。在地址栏后添加请求地址 /user ,回车访问新地址,将会打印出用户的相关信息。可以从图上看出,自定义配置已经生效,成功从自定义配置文件 user.properties 文件中读取到了属性数据。

为了不影响后续实验,完成该部分实验后,请将 User 类中刚才添加的内容删除或者注释,即下面这一行所示的内容。
@PropertySource(value = "classpath:user.properties")
多环境配置
在实际的项目开发过程中,有不同的开发环境例如测试环境、开发环境以及生产环境等等。不同的环境需要不同的配置。针对多环境的需求,Spring Boot 中可以事先提供多种环境的配置文件,再通过参数指定激活具体的配置文件便可以实现多环境的配置。
在 Spring Boot 中多环境配置文件名需要满足 application-{profile}.properties 的格式,其中 {profile} 对应你的环境标识,例如:
application-dev.properties:开发环境application-test.properties:测试环境application-prod.properties:生产环境
至于哪个具体的配置文件会被激活,需要在 application.properties 文件中通过 spring.profiles.active 属性来设置,其值对应配置文件中的 {profile} 值。例如,spring.profiles.active=test 就会激活 application-test.properties 配置文件的属性值。
在 src/main/resources 目录下新建 application-dev.properties 文件,添加以下配置内容到文件中。
# dev 环境
course.id=1
course.name=application-dev.properties
user.id=1
user.userName=application-dev.properties
user.level= 100
user.totalTime=${random.int(1000)}
接着再新建一个 application-test.properties 文件,添加以下配置内容到文件中。
# test 环境
course.id=1
course.name=application-test.properties
user.id=1
user.userName=application-test.properties
user.level= 100
user.totalTime=${random.int(1000)}
向默认配置文件 application.properties 添加以下内容,激活开发(dev)环境配置。
# 激活开发环境,使用开发环境设置
spring.profiles.active=dev
在终端上执行如下命令执行程序。
mvn spring-boot:run
编译运行后,通过实验楼内部环境的「 Web 服务」,进入到相应的页面验证实验结果。打开右侧的工具栏,点击「 Web 服务」。点击后,会在浏览器中打开一个网页,此时网址类似于 https://**************.simplelab.cn 。在地址栏后添加请求地址 /user ,回车访问新地址,将会打印出用户的相关信息。可以从图上看出,开发环境(dev)配置已经生效。

在实际的生产环境中,对于已经打包好的程序,是无法通过修改配置文件中spring.profiles.active 属性的值来切换不同的环境配置。此时,可以采用指定命名行参数的方式来切换配置。
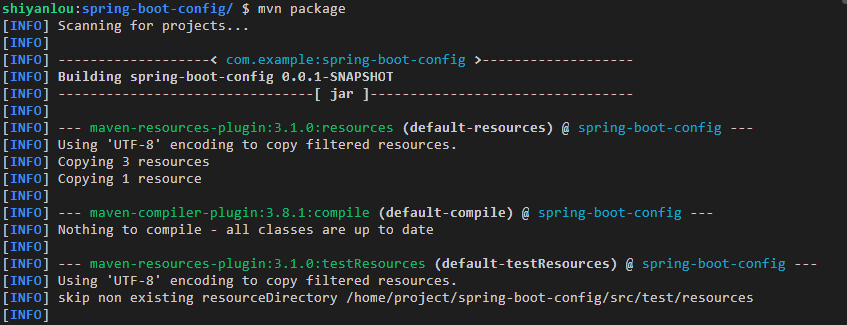
首先,需要将该项目打包。在终端上执行 mvn package 执行项目打包。

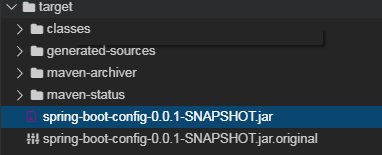
打包完成后,可以在左侧的 target 目录下看到已经打好的 Jar 包。

在命令行上执行下面的命令运行该程序。
java -jar target/spring-boot-config-0.0.1-SNAPSHOT.jar
可以看出,默认运行的是配置文件中已经设定好的开发环境(dev)。

点击工具栏右侧的「 Web 服务」,也可以验证是否是 dev 环境。
通过命令行参数的方式来切换配置时,只需在命令行后加上 --spring.profiles.active={profile} 。
例如,若要切换到测试(test)环境,需要在终端上输入下列命令。
java -jar target/spring-boot-config-0.0.1-SNAPSHOT.jar --spring.profiles.active=test
运行后,从下图可以看出,配置环境已经成功切换到了 test 版本。


YAML 版本的多环境配置与 Properties 文件是大同小异的。由于 YAML 文档块的特性,只需一个文件便可以实现多环境配置。在 YAML,使用 “—” 来分隔不同的文档。
你可以自行尝试 YAML 多环境配置,请删除掉 resources 目录下 Properties 格式的配置文件,新建一个 application.yml 文件。下面配置内容可供参考。
# 默认配置
spring:
  profiles:
    active: dev
---
# 开发环境
course:
  id: 1
  name: application-dev.yml
user:
  id: 2
  userName: application-dev.yml
  level: 2
  totalTime: ${random.int(1000)}
spring:
  profiles: dev
---
# 测试环境
course:
  id: 1
  name: application-test.yml
user:
  id: 2
  userName: application-test.yml
  level: 2
  totalTime: ${random.int(1000)}
spring:
  profiles: test
代码获取
wget https://labfile.oss.aliyuncs.com/courses/1510/spring-boot-config.zip
本文由 liyunfei 创作,采用 知识共享署名4.0
国际许可协议进行许可
本站文章除注明转载/出处外,均为本站原创或翻译,转载前请务必署名
最后编辑时间为: Jun 29,2022