
介绍
内容
在 Scala 中,Trait 为重用代码的一个基本单位。这是 Scala 非常有特色的一点,本节我们来了解一下什么是 Trait,以及如何使用它。
知识点
- Trait 的基本概念
- Trait 的基本用法
- 痩接口和胖接口设计
- Ordered Trait
- 实现可叠加的修改操作
环境
- Scala
- Xfce 终端
适合人群
本课程难度为一般,属于初级级别课程,适合零基础或具有 Java 编程基础的用户。
开发准备
Trait 的基本概念
在 Scala 中,Trait 为重用代码的一个基本单位。一个 Traits 封装了方法和变量。和 Interface 相比,它的方法可以有实现。这一点和抽象类定义类似。但和类继承不同的是,Scala 中类继承为单一继承,也就是说子类只能有一个父类。
当一个类可以和多个 Trait 混合,这些 Trait 定义的成员变量和方法也就变成了该类的成员变量和方法。由此可以看出,Trait 集合了 Interface 和抽象类的优点,同时又没有破坏单一继承的原则。
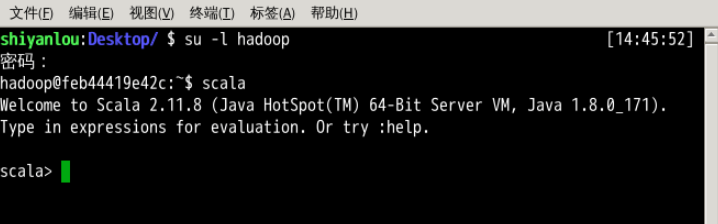
为了使用交互式 Scala 解释器,你可以在打开的终端中输入命令:
su -l hadoop #密码为 hadoop
scala
当出现 scala> 开始的命令行提示符时,就说明你已经成功进入解释器了。如下图所示。
步骤
Trait 的基本用法
下面我们来看看 Trait 的基本用法:
定义一个 Trait 的方法和定义一个类的方法非常类似,除了它使用 trait 而非 class 关键字来定义一个 trait。
trait Philosophical{
  def philosophize() {
    println("I consume memeory, therefor I am!")
  }
}
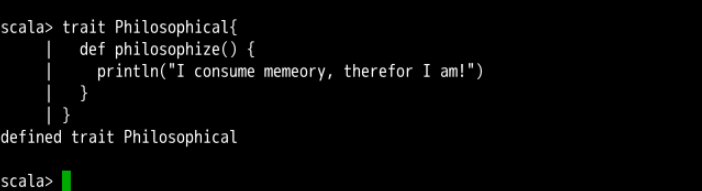
这个 Trait 名为 Philosophical。它没有声明基类,因此和类一样,有个缺省的基类 AnyRef。它定义了一个方法,叫做 philosophize。这是个简单的 Trait,仅够说明 Trait 如何工作。
一旦定义好 Trait,它就可以用来和一个类混合。这可以使用 extends 或 with 来混合一个 trait。例如:
class Frog extends Philosophical{
  override def toString="gree"
}
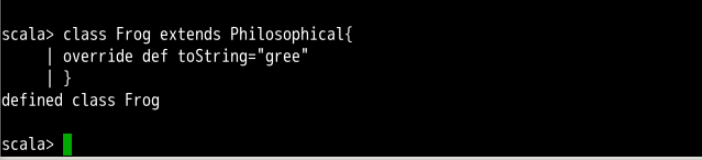
这里我们使用 extends 为 Frog 添加名为 Philosophical 的 Trait 属性。因此,Frog 默认继承自 Philosophical 的父类 AnyRef。这样,Frog 类也具有了 Philosophical 的性质。因此 Trait 也可以翻译成特质,但后面我们还是继续使用 Trait 原文。
scala> val frog = new Frog
frog: Frog = green

scala> frog.philosophize
I consume memeory, therefor I am!
可以看到,Frog 添加了 Philosophical(哲学性),也具有了哲学家的特性,可以说出类似“我思故我在”的话语了。和 Interface 一样,Trait 也定义一个类型。比如:
scala> val phil:Philosophical = frog
phil: Philosophical = green

scala> phil.philosophize
I consume memeory, therefor I am!
变量 phil 的类型为 Philosophical。
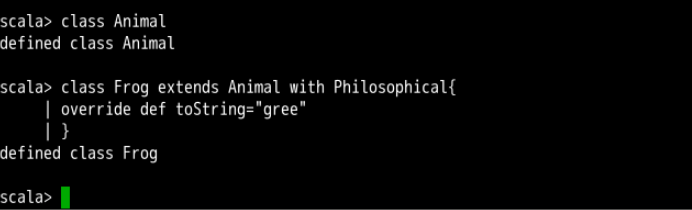
如果你需要把某个 Trait 添加到一个有基类的子类中,那么就要使用 extends 继承基类,并且通过 with 添加 Trait。比如:
class Animal

class Frog extends Animal with Philosophical{
  override def toString = "green"
}
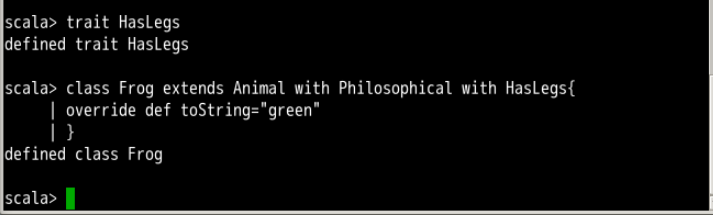
还是和 Interface 类似,你可以为某个类添加多个 Trait 属性。此时,使用多个 with 即可,比如:
class Animal
trait HasLegs
class Frog extends Animal with Philosophical with HasLegs{
  override def toString = "green"
}
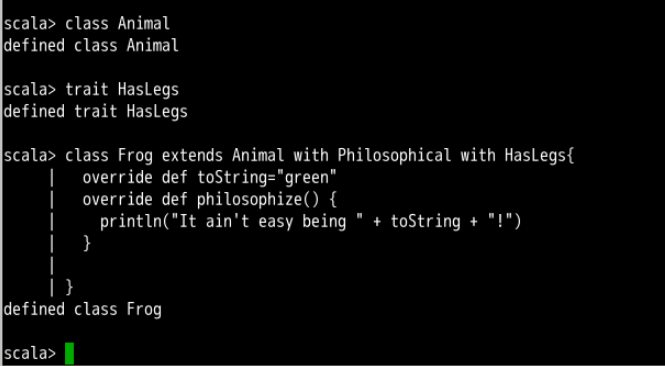
目前为止,你看到的例子中,类 Frog 都继承了 Philosophical 的 philosophize 实现。此外,Frog 也可以重载 philosophize 方法。语法与重载基类中定义的方法一样。
class Animal
trait HasLegs
class Frog extends Animal with Philosophical with HasLegs{
  override def toString = "green"
  override def philosophize() {
    println("It ain't easy being " + toString + "!")
  }

}
因为 Frog 的这个新定义仍然混入了特质 Philosophize,你仍然可以把它当作这种类型的变量使用。但是,由于 Frog 重载了 Philosophical 的 philosophize 实现,当你调用它的时候,你会得到新的回应:
scala> val phrog:Philosophical = new Frog
phrog: Philosophical = green

scala> phrog.philosophize
It ain't easy being green!
这时你或许可以推导出以下结论:Trait 就像是带有具体方法的 Java 接口。不过,它能做的更多。比方说,Trait 可以声明字段和维持状态值。实际上,你可以用 Trait 定义做任何用类定义做的事,并且语法也是一样的。但有两点是例外的:第一点是 Trait 不能有任何“类”参数;第二点是不能传递给类的主构造器的参数。另一方面,你可以定义如下的类:
class Point(x: Int, y: Int)
但下面的 Trait 定义会直接报错:
scala> trait NoPoint(x:Int,y:Int)
<console>:1: error: traits or objects may not have parameters
       trait NoPoint(x:Int,y:Int)
选择痩接口还是胖接口设计
Trait 的一种主要应用方式是可以根据类已有的方法自动为类添加方法。换言之,Trait 可以使得一个瘦接口变得丰满些,把它变成胖接口。
选择瘦接口还是胖接口,体现了面向对象设计中常会面临的一个问题——在实现者与接口用户之间的权衡。
胖接口有更多的方法,对于调用者来说更便捷。客户可以使用一个完全符合他们功能需要的方法。另一方面,瘦接口有较少的方法,对于实现者来说更简单。
然而,调用瘦接口的客户因此要写更多的代码。由于没有更多可选的方法调用,他们或许不得不选一个不太完美匹配他们所需的方法并为了使用它写一些额外的代码。
Java 的接口常常是过瘦而非过胖。例如,从 Java 1.4 开始引入的 CharSequence 接口,是对于字串类型的类来说通用的瘦接口,它持有一个字符序列。下面是把它看作 Scala 中 Trait 的定义:
trait CharSequence {
  def charAt(index: Int): Char
  def length: Int
  def subSequence(start: Int, end: Int): CharSequence
  def toString(): String
}
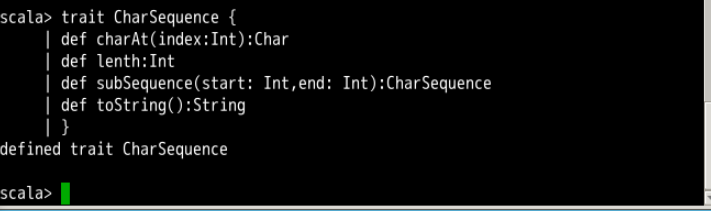
尽管在类 String 的大量方法中,有大多数都可以用在任何 CharSequence上,然而 Java 的 CharSequence 接口定义仅提供了 4 个方法。如果 CharSequence 包含全部 String 接口,那它将为 CharSequence 的实现者压上沉重的负担。为了任何一个 Java 里的 CharSequence 接口的实现,程序员将不得不定义一大堆方法。因为 Scala 的 Trait 可以包含具体方法,这使得创建胖接口变得非常便捷。
在 Trait 中,添加具体方法使得胖瘦对阵的权衡大大倾向于胖接口。不像在 Java 里那样,在 Scala 中添加具体方法是一次性的劳动。你只要在 Trait 中实现方法一次,而不再需要在每个混入 Trait 的方法中重新实现它。因此,与没有 Trait 的语言相比,Scala 里的胖接口没什么工作要做。
要使用 Trait 加强接口,只要简单地定义一个具有少量抽象方法的 Trait,即 Trait 接口的瘦部分和大量的、潜在的具体方法,并且所有的都实现在抽象方法之上。然后,你就可以把丰满了的 Trait 混入到类中,实现接口的瘦部分,并最终获得具有全部胖接口内容的类。
Trait 示例 —— Rectangular 对象
在设计绘图程序库时,常常需要定义一些具有矩形形状的类型:比如窗口、bitmap 图像、矩形选取框等。为了方便使用这些矩形对象,函数库对象类提供了查询对象宽度和长度的方法(比如 width,height )和坐标的 left、right、top 和 bottom 等方法。
然而,在实现这些函数库的这种方法时,如果使用 Java 来实现,就需要重复大量代码,工作量比较大(这些类之间不一定可以定义继承关系)。但如果使用 Scala 来实现这个图形库,则可以使用 Trait,从而为这些类方便地添加和矩形相关的方法。
首先我们先看看,如何不使用 Trait 来实现这些类。首先我们定义一些基本的几何图形类,比如 Point 和 Rectangle:
class Point(val x:Int, val y:Int)

class Rectangle(val topLeft:Point, val bottomRight:Point){
  def left = topLeft.x
  def right = bottomRight.x
  def width = right-left

  // and many more geometric methods
}
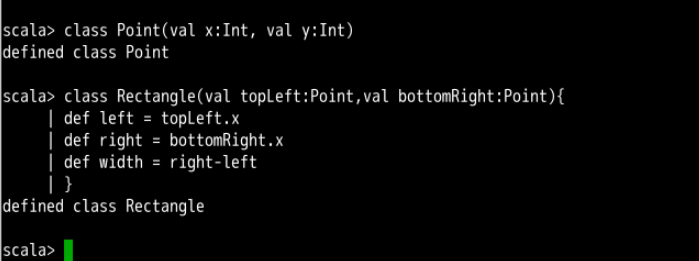
这里我们定义了一个点和矩形类。Rectangle 类的主构造函数使用了左上角和右下角坐标,然后定义了 left、right 和 width 等一些常用的矩形相关的方法。
同时,在函数库中,我们还可以定义一下 UI 组件(它并不是使用 Retangle 作为基类),其可能的定义如下:
abstract class Component {
  def topLeft :Point
  def bottomRight:Point

  def left = topLeft.x
  def right = bottomRight.x
  def width = right-left

  // and many more geometric methods

}
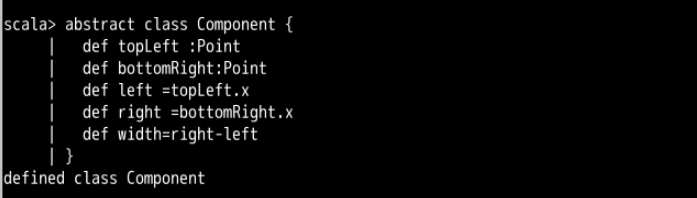
可以看到,left、right、width 的定义和 Rectangle 的定义重复了。可能函数库还会定义其它一些类,也可能重复这些定义。
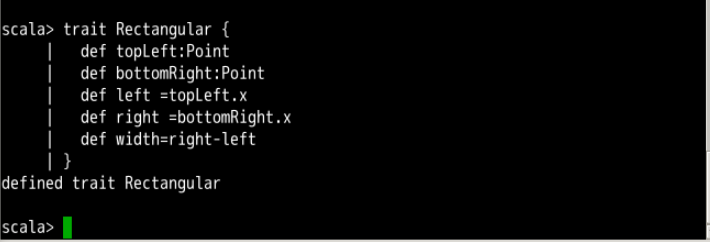
如果我们使用 Trait,就可以消除这些重复代码。比如我们可以定义如下的 Rectangular Trait 类型:
trait Rectangular {
  def topLeft:Point
  def bottomRight:Point

  def left = topLeft.x
  def right = bottomRight.x
  def width = right-left

  // and many more geometric methods
}
然后我们修改 Component 类的定义,使其“融入” Rectangular 特性:
abstract class Component extends Rectangular{
 // other methods
}

同样我们也修改一下 Rectangle 定义:
class Rectangle(val topLeft:Point, val bottomRight:Point) extends Rectangular{
  // other methods
}
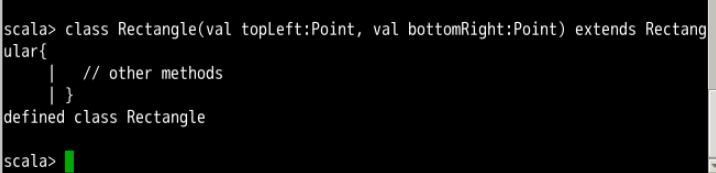
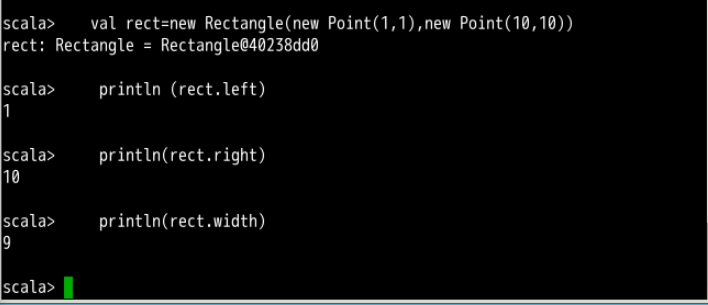
这样,我们就能将矩形相关的一些属性和方法抽象出来,定义在 Trait 中。凡是“混合”了这个 Rectangluar 特性的类,都自动包含了这些方法:
val rect = new Rectangle(new Point(1,1),new Point(10,10))
println (rect.left)
println(rect.right)
println(rect.width)
运行结果如下:
Ordered Trait
比较对象也是胖接口的一个较广泛的应用领域。当你需要比较两个有顺序关系的对象时,如果只需要一个方法就能知道需要比较的结果,就非常便利。比如,你需要“小于”关系,你希望使用 “<” 比较就可以了;如果是“小于等于”,使用 “<=” 就可以。
如果使用瘦接口来定义类,也许你只定义了一个 < 比较方法。在需要小于等于时,你可能需要使用 (x<y)|| (x==y)。一个胖接口定义了所有可能的比较运算符,使得你可以直接使用 <= 来书写代码。
但胖接口带来的便利也是有代价的,可以回头看看我们前面定义的 Rational 类(在本课程的《类和对象(二)》一节中有提到)。
如果我们需要定义比较操作,则需要定义如下代码:
class Rational(n: Int, d: Int) {
     // ...
     def < (that: Rational) =
     this.numer * that.denom > that.numer * this.denom
     def > (that: Rational) = that < this
     def <= (that: Rational) = (this < that) || (this == that)
     def >= (that: Rational) = (this > that) || (this == that)
 }
这个类定义了四个比较运算符 <、>、<= 和 >=。首先我们注意到,后面的三个比较运算符,都是通过第一个比较运算符来实现的。其次,我们也可以看到,后面三个比较操作对于任意对象都是适用的,而与对象的类型无关。而需要实现这四个比较运算的胖接口都要重复这些代码。
Scala 对于比较这种常见的操作,提供了 Ordered Trait 定义。使用它可以把所有的比较运算的代码通过一个 compare 定义来替代。这个 ordered trait 可以让需要实现比较运算的类,通过和它“融合”。这一切只需实现一个 compare 方法即可。
因此,我们可以修改前面的实现如下:
class Rational (n:Int, d:Int) extends Ordered[Rational]{
  //...

  override def compare (that:Rational) =
    (this.numer*that.denom)-(that.numer*that.denom)

}
要注意两点:一是 Ordered 需要指明类型参数 Ordered[T]。类型参数我们将在后面介绍,这里只需要知道添加所需比较类型的类名称(本例为 Rational)。此外,需要使用 compare 方法。它比较有序对象,若 =0,则表示两个对象相同;若 >0,则表示前面大于后面对象;当然如果是 <0,则表示前面的对象小于后面的对象。
下面为完整代码以及测试结果:
class Rational (n:Int, d:Int) extends Ordered[Rational]{
    require(d != 0)
    private val g = gcd (n.abs,d.abs)
    val numer = n/g
    val denom = d/g
    override def toString = numer + "/" +denom
    def +(that:Rational)  =
        new Rational(
          numer * that.denom + that.numer* denom,
          denom * that.denom
        )
    def * (that:Rational) =
        new Rational( numer * that.numer, denom * that.denom)
    def this(n:Int) = this(n,1)
    private def gcd(a:Int,b:Int):Int =
        if(b==0) a else gcd(b, a % b)

    override def compare (that:Rational) =
        (this.numer*that.denom)-(that.numer*that.denom)

    }
scala> val half = new Rational(1,2)
half: Rational = 1/2

scala>   val third = new Rational(1,3)
third: Rational = 1/3

scala> half < third
res0: Boolean = false

scala> half >= third
res1: Boolean = true
因此,你在需要实现比较对象时,首先要考虑 Ordered Trait。看看这个 Trait 能否满足要求,然后通过和这个 Trait “混合”,就可以很方便的实现对象之间的比较。
此外要注意,Ordered Trait 没有定义 equal 方法。因为如果需要定义 equal 方法,那么需要检查传入参数的类型,Ordered Trait 无法实现。因此,如果你需要 == 比较运算符,需要另外定义。
用 Trait 来实现可叠加的修改操作
我们已经看到 Trait 的一个主要用法是将一个瘦接口变成胖接口。本节我们介绍 Trait 的另外一个重要用法:为类添加一些可以叠加的修改操作。
Trait 能够修改类的方法,并且能够通过叠加这些操作(不同组合)修改类的方法。
我们来看这样一个例子:修改一个整数队列,这个队列有两个方法:put 为队列添加一个元素,get 从队列读取一个元素。队列是先进先出,因此 get 读取的顺序和 put的顺序是一致的。
对于上面的队列,我们定义如下三个 Trait 类型:
- Doubling:队列中所有元素 X 2。
- Incrementing:队列中所有元素递增。
- Filtering: 过滤到队列中所有负数。
这三个 Trait 代表了修改操作,因为它们可以用来修改队列类对象,而不是为队列类定义所有可能的操作。这三个操作是可以叠加的,也就是说,你可以通过这三个基本操作的任意不同组合和原始的队列类“混合”,从而得到你所需要的新的队列类的修改操作。
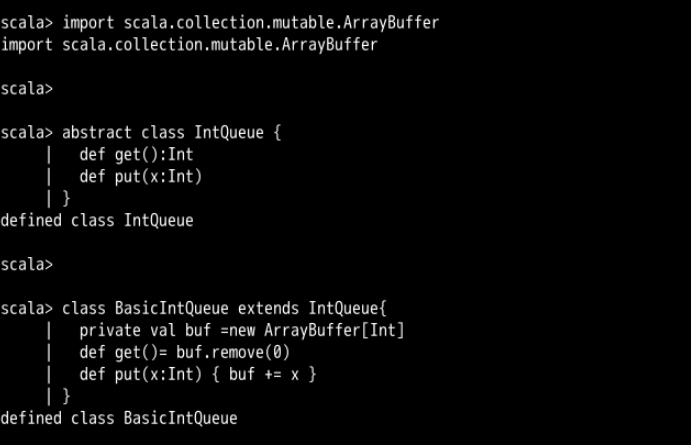
为了实现这个整数队列,我们可以定义这个整数队列的一个基本实现如下:
import scala.collection.mutable.ArrayBuffer

abstract class IntQueue {
  def get():Int
  def put(x:Int)
}

class BasicIntQueue extends IntQueue{
  private val buf = new ArrayBuffer[Int]
  def get() = buf.remove(0)
  def put(x:Int) { buf += x }
}
下面我们可以使用这个实现,来完成队列的一些基本操作:
scala> val queue = new BasicIntQueue
queue: BasicIntQueue = BasicIntQueue@60d134d3

scala> queue.put (10)

scala> queue.put(20)

scala> queue.get()
res2: Int = 10

scala> queue.get()
res3: Int = 20
这个实现完成了对象的基本操作,看起来还可以。但是,如果此时有新的需求,希望在添加元素时,添加元素的双倍,并且过滤掉负数,你可以直接修改 put 方法来完成。但之后需求又变了,添加元素时,添加的为参数的递增值,你又可能要修改 put 方法。此时就显得队列的实现不够灵活。
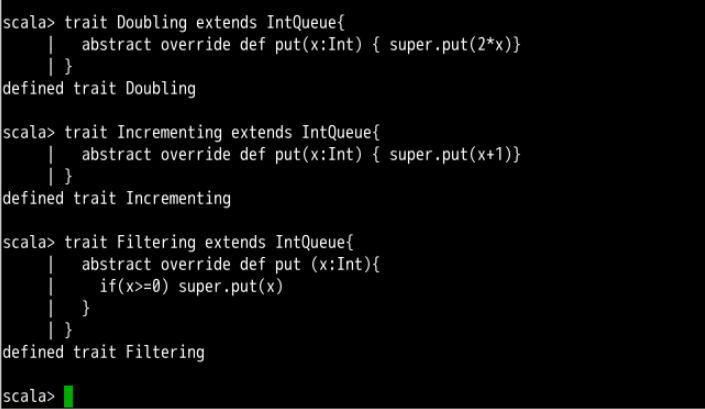
我们来看看如果使用 Trait 会有什么结果,我们实现 Doubling、Incrementing 和 Filtering 如下:
trait Doubling extends IntQueue{
  abstract override def put(x:Int) { super.put(2*x)}
}

trait Incrementing extends IntQueue{
  abstract override def put(x:Int) { super.put(x+1)}
}

trait Filtering extends IntQueue{
  abstract override def put (x:Int){
    if(x >= 0) super.put(x)
  }
}
我们可以看到:所有的 Trait 实现都以 IntQueue 为基类,这保证这些 Trait 只能和同样继承了 IntQueue 的类“混合”。比如和 BasicIntQueue 混合,而不可以和前面定义的 Rational 类混合。
此外,Trait 的 put 方法中使用了 super。通常情况下,对于普通的类,这种调用是不合法的。但对于 trait 来说,这种方法是可行的,这是因为 trait 中的 super 调用是动态绑定的。只要和这个 Trait 混合在其他类或 Trait 之后,而这个其它类或 Trait 定义了 super 调用的方法即可。若要实现可以叠加的修改操作,这种方法是必须的。并且,要注意使用 abstract override 修饰符,这种使用方法仅限于 Trait 而不能用作 Class 的定义上。
有了这三个 Trait 的定义,我们就可以非常灵活的组合这些 Trait 来修改 BasicIntQueue 的操作。
首先我们使用 Doubling Trait:
scala> val queue = new BasicIntQueue with Doubling
queue: BasicIntQueue with Doubling = $anon$1@3b004676

scala> queue.put(10)

scala> queue.get()
res1: Int = 20
这里通过 BasicIntQueue 和 Doubling 混合,我们构成了一个新的队列类型,每次添加的都是参数的倍增。
我们在使用 BasicIntQueue 的同时,与 Doubling 和 Increment 混合。注意,我们构造了两个不同的整数队列,不同是 Doubling 和 Increment 的混合的顺序。
scala> val queue1 = new BasicIntQueue with Doubling with Incrementing
queue1: BasicIntQueue with Doubling with Incrementing = $anon$1@35849932

scala> val queue2 = new BasicIntQueue with Incrementing  with Doubling
queue2: BasicIntQueue with Incrementing with Doubling = $anon$1@4a4cdea2

scala> queue1.put(10)

scala> queue1.get()
res4: Int = 22

scala> queue2.put(10)

scala> queue2.get()
res6: Int = 21
可以看到,结果和 Trait 混合的顺序有关。简单地说,越在后面混合的 Trait 作用越大。因此 queue1 先 +1,然后 x2,而 queue2 先 x2 后 +1。
最后我们看看三个 Trait 混合的例子:
scala> val queue = new BasicIntQueue with Doubling with Incrementing with Filtering
queue: BasicIntQueue with Doubling with Incrementing with Filtering = $anon$1@73a4eb2d

scala> queue.put(10)

scala> queue.put(-4)

scala> queue.put(20)

scala> queue.get()
res10: Int = 22

scala> queue.get()
res11: Int = 42

scala> queue.get()
java.lang.IndexOutOfBoundsException: 0
        at scala.collection.mutable.ResizableArray$class.apply(ResizableArray.scala:44)
        at scala.collection.mutable.ArrayBuffer.apply(ArrayBuffer.scala:44)
        at scala.collection.mutable.ArrayBuffer.remove(ArrayBuffer.scala:163)
        at BasicIntQueue.get(<console>:11)
        at .<init>(<console>:15)
        at .<clinit>(<console>)
        at .<init>(<console>:11)
        at .<clinit>(<console>)
        at $print(<console>)
        at sun.reflect.NativeMethodAccessorImpl.invoke0(Native Method)
        at sun.reflect.NativeMethodAccessorImpl.invoke(NativeMethodAccessorImpl.java:57)
        at sun.reflect.DelegatingMethodAccessorImpl.invoke(DelegatingMethodAccessorImpl.java:43)
        at java.lang.reflect.Method.invoke(Method.java:606)
        at scala.tools.nsc.interpreter.IMain$ReadEvalPrint.call(IMain.scala:704)
        at scala.tools.nsc.interpreter.IMain$Request$$anonfun$14.apply(IMain.scala:920)
        at scala.tools.nsc.interpreter.Line$$anonfun$1.apply$mcV$sp(Line.scala:43)
        at scala.tools.nsc.io.package$$anon$2.run(package.scala:25)
        at java.lang.Thread.run(Thread.java:744)
最后的异常是因为队列为空(过滤掉了负数),我们没有添加错误处理,元素 -4 没有被添加到了队列中。
本文由 liyunfei 创作,采用 知识共享署名4.0
国际许可协议进行许可
本站文章除注明转载/出处外,均为本站原创或翻译,转载前请务必署名
最后编辑时间为: Jun 24,2022