
设计流程及明确需求
经典的软件开发流程为:
- 需求分析
- 概要设计
- 详细设计
- 编码
- 测试
- 软件交付
- 验收
- 维护
但作为个人设计的项目,我们可以在此基础上做一些精简,加快开发效率,简单概括为如下几个步骤:
- 需求分析
- 技术选型
- 架构设计
- 编码
- 测试
本节主要着重讲解前三个步骤,编码及测试环节将贯穿整个项目。
首先是项目需求:所谓需求,就是要确定我们的项目要做什么,实现哪些功能,由此分别引出项目定位和功能设计两部分内容。
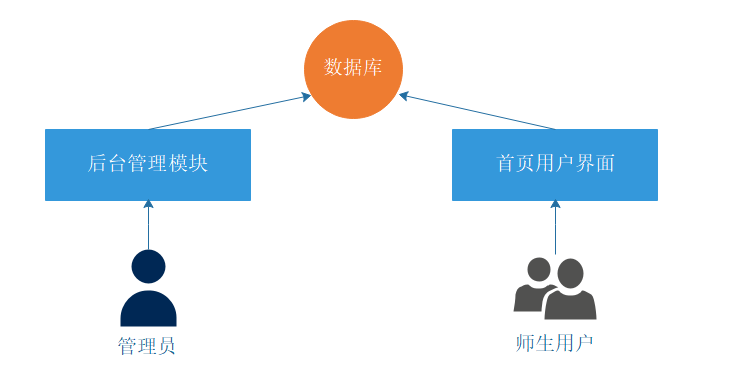
本项目的定位是做一个校内的在线题库系统,实现题目信息发布与共享。其中包含两个部分的代码,即后台管理模块与前台用户界面。
做功能分析时,建议大家使用思维导图来呈现,如下(越详细越好):
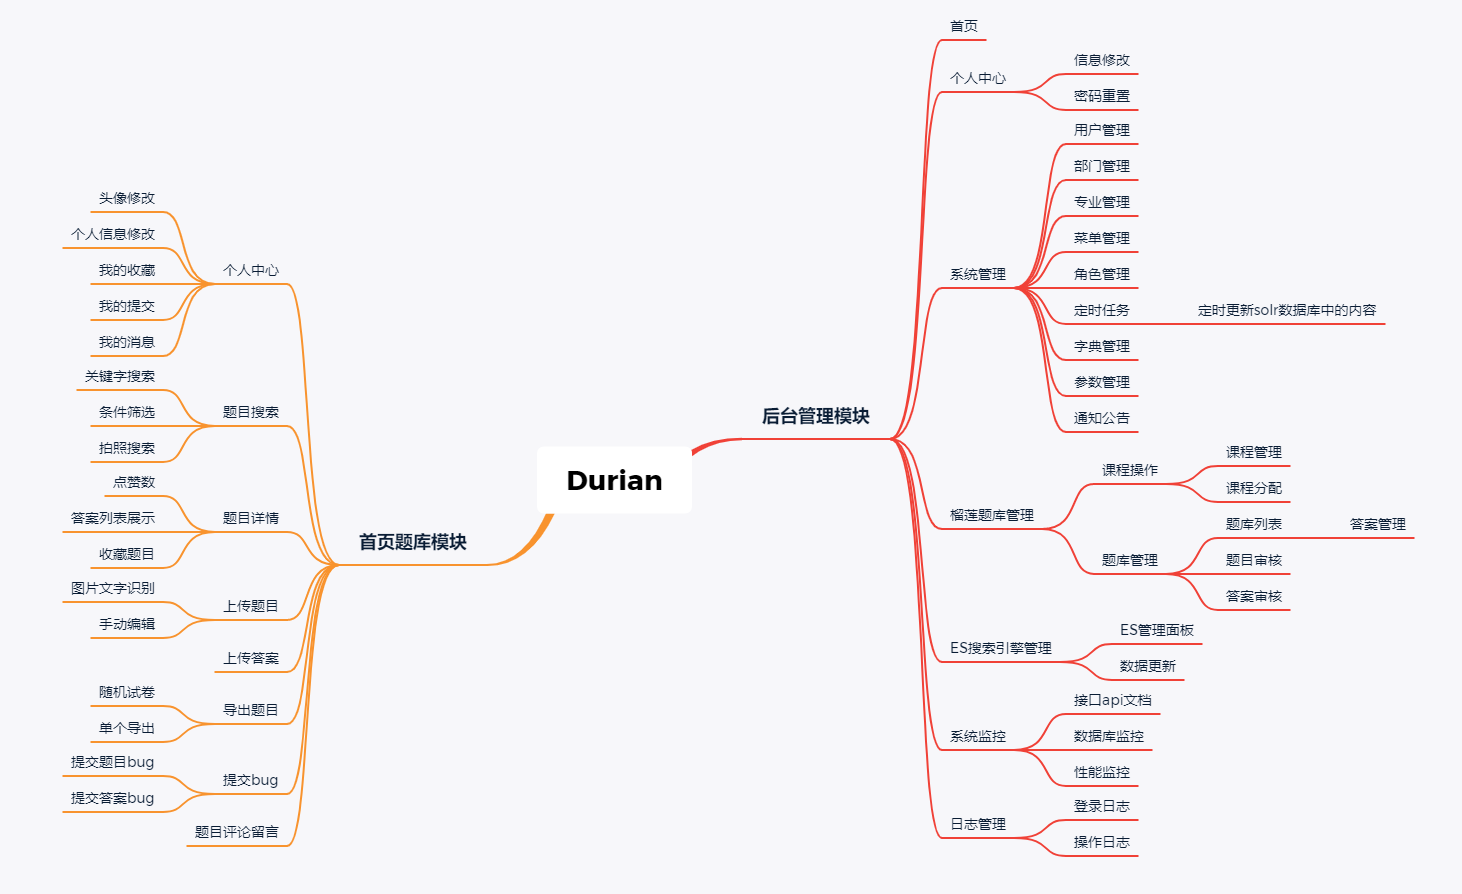
由于课时有限,我只带领大家实现项目前后端的核心需求,其它部分需求举一反三即可。
选择适合的技术栈
确定好项目需求后,接下来就是选择适合的技术栈去实现我们的需求,这里给大家列出项目使用到的技术栈,选择依据将会在使用时说明。
- 开发规范:
- 阿里巴巴 Java 开发手册
- 系统环境
Java EEServletApache MavenDocker
- 基础服务
ElasticSerachik分词器
- 主框架
Spring BootSpring FrameworkSpring Security
- 持久层框架
Apache MyBatisHibernate ValidationAlibaba Druid
- 视图层
BootstrapThymeleaf(ruoyi项目对组件的封装)
架构的选择及学习优秀项目
作为 Java 应用,目前主流的系统架构有两种——传统的单体应用和微服务架构。虽说微服务分布式的技术近些年很火,但适合的才是最好的,如果项目本身的业务单一,对高可用、高并发的要求不高,那么选择微服务架构不仅增加了开发的难度,也增加了软件本身的运行成本。因此本项目使用的是基于传统单体应用的架构,体积小、开发周期短,适合业务逻辑简单、访问量小的应用。项目的设计架构如下图所示:
不过作为学习,我也很鼓励学员们在完成该项目后,尝试使用 SpringCloud 之类的微服务框架,对项目进行升级。
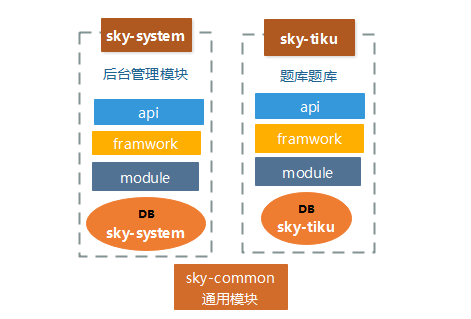
由架构图可知,一个独立的项目模块是由三个子模块组成,各个模块的含义如下:
| 模块名 | 含义 |
|---|---|
sky-framework |
相关框架的模块,例如 Spring、Mybatis 等配置 |
sky-api |
对外提供 Api 服务的模块 |
sky-module |
持久层和 Service 接口模块,此处代码可完全由生成器生成 |
不过本项目为了简化开发,将 framework 以下的模块公用,只扩展出了不同的接口层,结构如下:
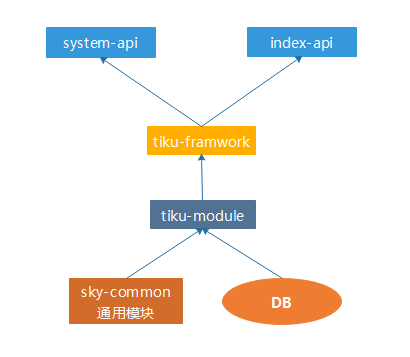
接口层本项目将着重对 system-api 进行讲解,并为首页展示提供数据接口即可,以缩短开发和学习的周期。
从开源项目中吸收营养
在做研发时往往需要创新精神,敢于从零开始。但在做应用开发时,最忌讳重复造轮子的操作。因此,借鉴优秀项目的优秀设计,不仅可以加快我们的开发效率,并且使用封装好的模块可以大大降低 bug 率,本项目主要使用了如下两个开源项目协助开发。
RuoYi 是一个 Java EE 企业级快速开发平台,基于经典技术组合(Spring Boot、Apache Shiro、MyBatis、Thymeleaf、Bootstrap),内置模块如:部门管理、角色用户、菜单及按钮授权、数据权限、系统参数、日志管理、通知公告等。在线定时任务配置;支持集群,支持多数据源。
Orange 是专为 CMS 系统设计的代码生成器,独创关联表跳跃设计,遵循阿里巴巴规范,使您的开发事半功倍。这个工具我已经专为此项目做了个性化的设置,将在之后持久层的设计中为大家介绍使用详情。
新建并导入项目
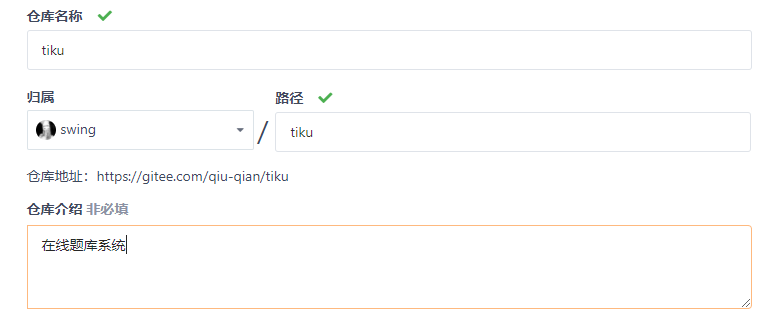
新建项目之前,我们首先要确保项目的代码能有一个可靠的版本托管平台,以保证稳定的迭代与更新,现主流的托管平台有 Github 与 Gitee。这里我使用国内的 Gitee 作为演示,开始新建项目。
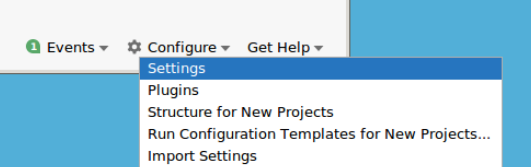
然后进入我们的云主机,打开 IDEA ,先不着急导入项目,这里我们需要先配置 Maven 的默认地址,进入设置。
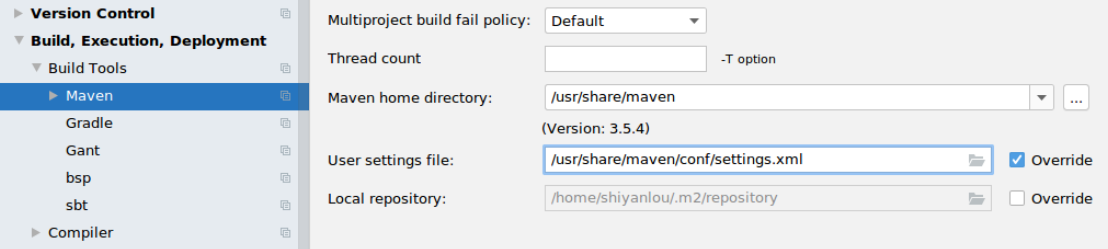
配置对应的 Maven 地址,点击应用即可。
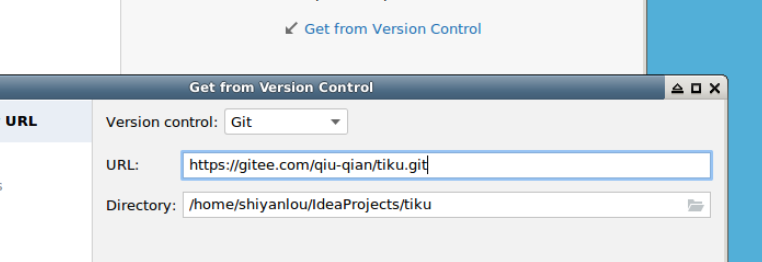
然后选择 Get from Version Control 的方式导入项目,输入上面新建项目的 Git 克隆地址即可。
初始化 Maven 模块
项目根目录下的 pom.xml 由于内容较多,为了不影响阅读体验,这里直接从远程下载文件即可,方法如下(后文其它代码的获取方式与此相同)。
打开终端,进入项目根目录下执行如下命令:
cd /home/shiyanlou/IdeaProjects/tiku
curl -o pom.xml https://labfile.oss.aliyuncs.com/courses/3332/tiku-pom.xml

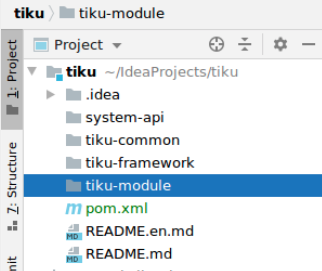
然后在项目根目录下新建四个文件夹 system-api,tiku-common,tiku-framework,tiku-module,结构如下:
最后在各 Maven 模块下新建 pom.xml 文件。
在 system-api 目录下新建 pom.xml 文件,内容如下:
<?xml version="1.0" encoding="UTF-8"?>
<project xmlns="http://maven.apache.org/POM/4.0.0" xmlns:xsi="http://www.w3.org/2001/XMLSchema-instance"
         xsi:schemaLocation="http://maven.apache.org/POM/4.0.0 http://maven.apache.org/xsd/maven-4.0.0.xsd">
    <modelVersion>4.0.0</modelVersion>

    <parent>
        <groupId>com.swing</groupId>
        <artifactId>tiku</artifactId>
        <version>1.0.0-SNAPHOT</version>
    </parent>

    <artifactId>system-api</artifactId>
    <packaging>jar</packaging>
    <description>晴空管理系统接口</description>

    <dependencies>
        <dependency>
            <groupId>com.swing</groupId>
            <artifactId>tiku-framework</artifactId>
        </dependency>

        <dependency>
            <groupId>org.springframework.boot</groupId>
            <artifactId>spring-boot-starter-test</artifactId>
        </dependency>
    </dependencies>

    <build>
        <plugins>
            <plugin>
                <groupId>org.springframework.boot</groupId>
                <artifactId>spring-boot-maven-plugin</artifactId>
                <configuration>
                    <fork>true</fork>
                </configuration>
                <executions>
                    <execution>
                        <goals>
                            <goal>repackage</goal>
                        </goals>
                    </execution>
                </executions>
            </plugin>
            <plugin>
                <groupId>org.apache.maven.plugins</groupId>
                <artifactId>maven-war-plugin</artifactId>
                <configuration>
                    <failOnMissingWebXml>false</failOnMissingWebXml>
                    <warName>${project.artifactId}</warName>
                </configuration>
            </plugin>
        </plugins>
        <finalName>${project.artifactId}</finalName>
    </build>
</project>
在 tiku-common 目录下新建 pom.xml 文件,内容如下:
<?xml version="1.0" encoding="UTF-8"?>
<project xmlns="http://maven.apache.org/POM/4.0.0" xmlns:xsi="http://www.w3.org/2001/XMLSchema-instance"
         xsi:schemaLocation="http://maven.apache.org/POM/4.0.0 http://maven.apache.org/xsd/maven-4.0.0.xsd">
    <modelVersion>4.0.0</modelVersion>

    <parent>
        <groupId>com.swing</groupId>
        <artifactId>tiku</artifactId>
        <version>1.0.0-SNAPHOT</version>
    </parent>

    <artifactId>tiku-common</artifactId>
    <packaging>jar</packaging>

    <dependencies>
        <dependency>
            <groupId>org.springframework</groupId>
            <artifactId>spring-context-support</artifactId>
        </dependency>
        <dependency>
            <groupId>org.springframework.boot</groupId>
            <artifactId>spring-boot-starter-web</artifactId>
        </dependency>
        <dependency>
            <groupId>org.springframework.boot</groupId>
            <artifactId>spring-boot-starter-aop</artifactId>
        </dependency>
        <dependency>
            <groupId>org.springframework.boot</groupId>
            <artifactId>spring-boot-configuration-processor</artifactId>
            <optional>true</optional>
        </dependency>
        <dependency>
            <groupId>org.springframework.security</groupId>
            <artifactId>spring-security-core</artifactId>
        </dependency>
        <dependency>
            <groupId>cn.hutool</groupId>
            <artifactId>hutool-all</artifactId>
            <version>5.3.5</version>
        </dependency>
        <dependency>
            <groupId>com.alibaba</groupId>
            <artifactId>fastjson</artifactId>
        </dependency>
        <dependency>
            <groupId>org.hibernate.validator</groupId>
            <artifactId>hibernate-validator</artifactId>
        </dependency>
        <dependency>
            <groupId>org.apache.commons</groupId>
            <artifactId>commons-lang3</artifactId>
        </dependency>
        <dependency>
            <groupId>commons-io</groupId>
            <artifactId>commons-io</artifactId>
        </dependency>
        <dependency>
            <groupId>commons-fileupload</groupId>
            <artifactId>commons-fileupload</artifactId>
        </dependency>
        <dependency>
            <groupId>com.github.oshi</groupId>
            <artifactId>oshi-core</artifactId>
        </dependency>
        <dependency>
            <groupId>eu.bitwalker</groupId>
            <artifactId>UserAgentUtils</artifactId>
        </dependency>
        <dependency>
            <groupId>com.google.guava</groupId>
            <artifactId>guava</artifactId>
            <version>21.0</version>
        </dependency>

    </dependencies>

</project>
在 tiku-framework 目录下新建 pom.xml 文件,内容如下:
<?xml version="1.0" encoding="UTF-8"?>
<project xmlns="http://maven.apache.org/POM/4.0.0" xmlns:xsi="http://www.w3.org/2001/XMLSchema-instance"
         xsi:schemaLocation="http://maven.apache.org/POM/4.0.0 http://maven.apache.org/xsd/maven-4.0.0.xsd">
    <modelVersion>4.0.0</modelVersion>

    <parent>
        <groupId>com.swing</groupId>
        <artifactId>tiku</artifactId>
        <version>1.0.0-SNAPHOT</version>
    </parent>

    <artifactId>tiku-framework</artifactId>
    <packaging>jar</packaging>

    <dependencies>
        <dependency>
            <groupId>com.swing</groupId>
            <artifactId>tiku-module</artifactId>
        </dependency>
    </dependencies>
</project>
在 tiku-module 目录下新建 pom.xml 文件,内容如下:
<?xml version="1.0" encoding="UTF-8"?>
<project xmlns="http://maven.apache.org/POM/4.0.0" xmlns:xsi="http://www.w3.org/2001/XMLSchema-instance"
         xsi:schemaLocation="http://maven.apache.org/POM/4.0.0 http://maven.apache.org/xsd/maven-4.0.0.xsd">
    <modelVersion>4.0.0</modelVersion>

    <parent>
        <groupId>com.swing</groupId>
        <artifactId>tiku</artifactId>
        <version>1.0.0-SNAPHOT</version>
    </parent>

    <artifactId>tiku-module</artifactId>
    <packaging>jar</packaging>


    <dependencies>
        <dependency>
            <groupId>com.swing</groupId>
            <artifactId>tiku-common</artifactId>
        </dependency>
    </dependencies>
</project>
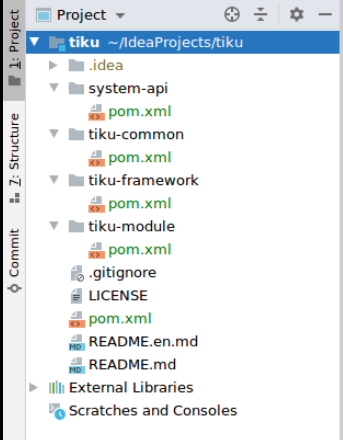
完成后的目录结构如下:
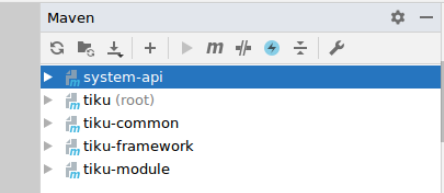
配置完所有的 pom.xml 后,接下来需要导入依赖,右键项目根目录 pom.xml 或者任意模块的 pom.xml,选择 Add as Maven Project 导入 Maven 项目。
导入依赖大概需要五六分钟,稍等即可,如右侧无报错,即说明导入成功。
编写 Spring Boot 入口类并运行
项目的开发采用的是测试先行,因此,在开始正式写业务逻辑代码前,应该先确保一个简单的 Spring Boot 入口类可以跑通。
在 system-api 下新建 Maven 的标准目录结构,然后在 com.swing.sky.system 包下新建 Spring Boot 的入口类 Sky.java,代码如下:
package com.swing.sky.system;

import org.springframework.boot.SpringApplication;
import org.springframework.boot.autoconfigure.SpringBootApplication;
import org.springframework.boot.autoconfigure.jdbc.DataSourceAutoConfiguration;

@SpringBootApplication(exclude = {DataSourceAutoConfiguration.class})
public class Sky {
    public static void main(String[] args) {
        System.setProperty("spring.devtools.restart.enabled", "false");
        SpringApplication.run(Sky.class, args);
        System.out.println("Start Successfully....");
    }
}
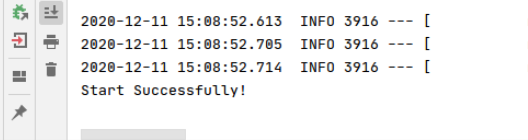
右键运行。

控制台如下输出,即成功跑通入口程序。
编写测试用例并运行
在开发工作中,通常写好代码后我们都会先自测一遍再交给测试部门,自测的方法有多种,也有多种测试工具,比如 Postman、Jmeter 等,本项目的开发则使用 SpringBoot Test 单元测试,因此,我们需要先来跑一个简单的单元测试用例。
在 src/test/java 下新建测试类 SkyTest.java 内容如下:
import com.swing.sky.system.Sky;
import org.junit.Test;
import org.junit.runner.RunWith;
import org.springframework.boot.test.context.SpringBootTest;
import org.springframework.test.context.junit4.SpringRunner;

@RunWith(SpringRunner.class)
@SpringBootTest(classes = Sky.class)
public class SkyTest {
    @Test
    public void test3() {
        System.out.println("Test SuccessFul");
    }
}
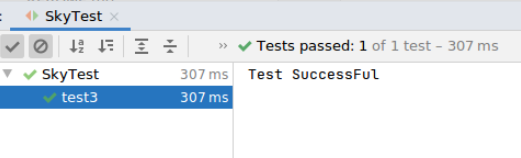
右键运行,结果如下即为通过:
windows环境配置
1. 环境版本说明
1.1 IDEA版本

1.2 Mysql版本
可以使用最新版本的mariadb, 课堂使用5.5 版本 最好不要使用Mysql8.0版本

2. IDEA环境配置
2.1 IDEA环境说明
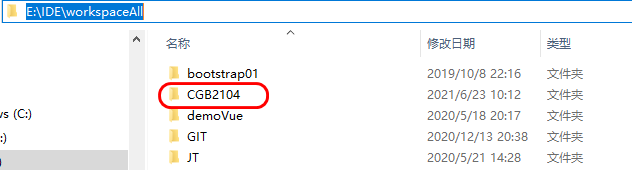
工作空间: 理论上可以存储多个项目.
程序员操守: 路径中不要有中文,空格,特殊字符.
2.2 IDEA环境搭建参见PPT
2.3 IDEA 关于插件说明
2.3.1 社区版本
说明: 社区版本 没有Spring/JS/HTML的支持. 需要针对于SpringBoot 需要安装特定的插件.
提前安装Spring Assistant 该版本正式版本中 没有该插件.

2.3.2 正式版本
说明: 正式版本中 自带了SpringBoot的插件.所以无需下载

2.3.3 Lombok安装
说明: 当创建一个实体对象时,必须写get/set/toString/构造/equals/hash等方法 该方法必须有.
为了优化上述的操作,则引入lombok插件(主流用法)
提前安装:

2.4 SpringBoot项目入门
2.4.1 框架的作用
- SpringMVC 作用: 接收用户提交的数据,返回服务器数据.(交互)
- Spring 作用: 整合其他的第三方框架,可以让程序调用以一种统一的方式进行调用 (整合)
- Mybatis 作用: 整合JDBC 方便用户与数据库进行交互(持久化)
- SpringBoot 作用: 简化Spring等框架的操作(简化)
理解: SpringBoot就是一个框架的高级API
2.4.2 框架之间的关系

2.5 创建SpringBoot项目
2.5.1 创建项目

2.5.2 选择依赖

2.5.3 SpringBoot报错(一)

2.5.3 SpringBoot报错(二)

3 创建SpringBoot高级用法
3.1 关于maven坐标说明
3.1.0 Maven常见命令
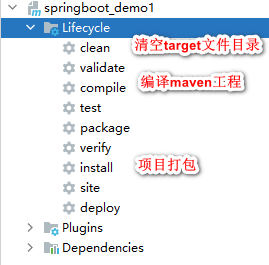
3.1.1 Maven常见命令说明
- install 项目打包命令

idea 中backage打jar包后 , jar包是在项目下的target目录下.
java -jar "D:\target\demo.jar" //发布项目
- clean 清空target文件目录的.
注意事项: clean 只会清空target文件目录的内容,本地仓库中的文件不会清理.
所以每次项目打包都要重新install.
3.1.2 坐标
    <!--坐标的说明:  只要是一个Maven工程必然会有坐标-->
    <!--groupId 组ID: 公司域名倒写-->
    <groupId>com.jt</groupId>
    <!--项目名称 名称唯一-->
    <artifactId>springboot_demo1</artifactId>
    <!--版本: 可以自己指定-->
    <version>0.0.1-SNAPSHOT</version>
3.1.3 作用
- 可以唯一标识项目的路径
- 坐标是将来项目打包的位置
- 改jar包文件可以被其他项目依赖
3.2 关于POM.xml文件说明
3.2.1 知识铺垫
说明: 作为大型项目开发,里边必然会引入很多的jar包文件(公共第三方,自己公司的jar包). 由于jar包文件众多.则可能引发jar包文件冲突的问题!!!
问: 如何解决?
3.2.2 parent标签说明
2015年SpringBoot框架进入人们的视野,其中最为主要的是Parent标签的定义.parent标签,是Spring官网负责维护, 在其中定义了几乎所有的框架与SpringBoot兼容的版本信息.
作用: 集中定义版本号
parent标签 父级工程
SpringBoot将现有主流的框架都进行了整合,
在内部完成了jar包的依赖的配置.如果用户需要,则只添加某些核心包
那么所有的依赖都会按照规则自动的下载.
 <!--集中定义版本号-->
    <parent>
        <groupId>org.springframework.boot</groupId>
        <artifactId>spring-boot-starter-parent</artifactId>
        <version>2.5.1</version>
        <relativePath/> <!-- lookup parent from repository -->
    </parent>
3.3.3 dependencies作用
Springboot通过启动项的方法的 进行jar包文件的加载.
同时这些功能中的配置项 SpringBoot有些也会自动的完成.
无特殊的要求 无需手动的配置.
开箱即用的思想!!!

3.3.4 build 作用
关于build标签说明
1.build标签它是maven工程的要求.
2.作用: 完成项目的打包/发布等一系列的功能.
3.该标签的使用是SpringBoot必须的,如果没有该标签则项目无法使用jar包运行

3.3 关于SpringBoot配置文件说明
3.3.1 properties文件说明
说明: 虽然pro文件是SpringBoot默认配置文件.但是其中编码格式比较繁琐,不便于查看.所以在项目中一般使用YML文件.

当properties配置文件和jml都配置时,程序运行先加载yml再加载properties配置文件,同名时,遵循覆盖原则。但是properties配置文件会出现中文乱码,快速处理方法如下:
在setting-fileEncodings全部改成utf-8,不要忘了打钩

3.3.2 YML文件说明
1、File---->Settings
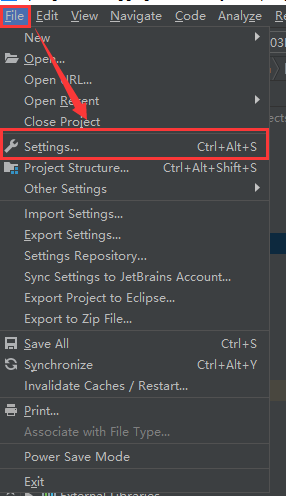
2、Editor---->File And Code Templates —>中间选中Files ----->点击+号,添加模板 ----->输入模板名字:Name:Yml File.xml (name可以自定义) ------>后缀名extension:yml

3、选中文件夹----->New-------->找到Yml File,就可以创建yml文件了


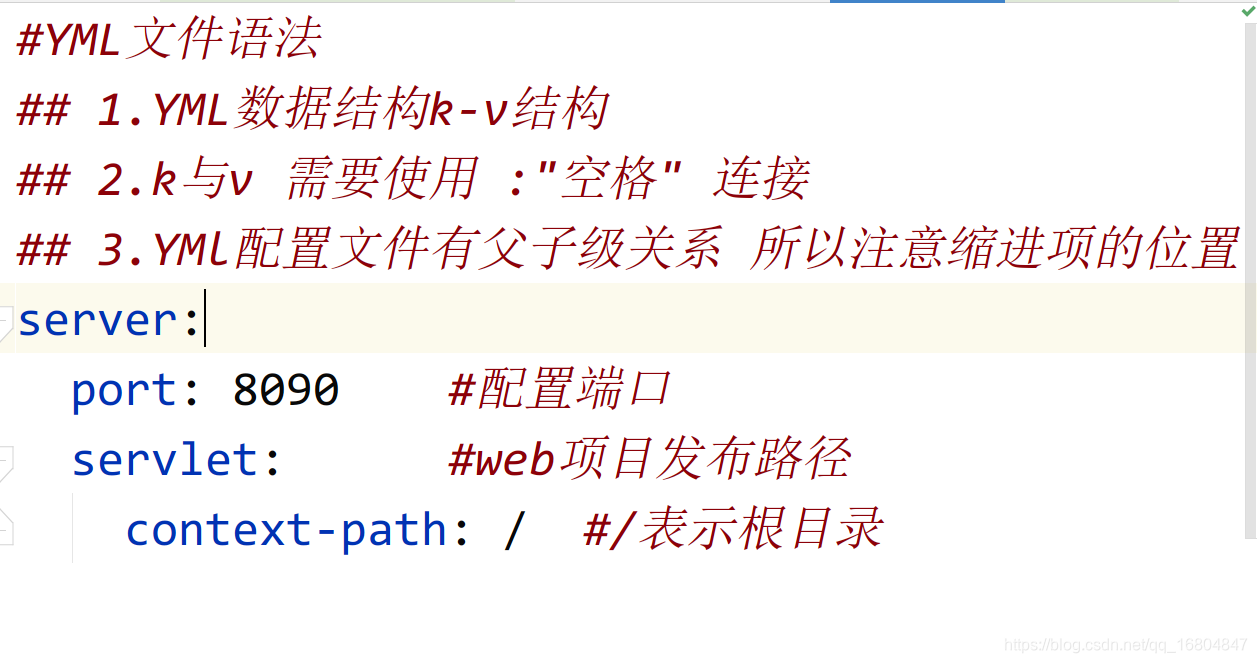
#YML文件语法
## 1.YML数据结构k-v结构
## 2.k与v 需要使用 :"空格" 连接
## 3.YMl配置文件有父子级关系 所以注意缩进项的位置
server:
  port: 8090    #配置端口
  servlet:      #web项目发布路径
    context-path: /  #/表示根目录

#定义dept属性值 YML文件默认支持UTF-8
dept:
  id: 100
  name: 财务部
3.4 入门案例
3.4.1 案例要求
1.编辑HelloController
2.请求路径 http://localhost:8090/hello
3.获取结果 获取 "欢迎使用SpringBoot"的字样
3.4.2 包的位置
注意事项!!!: 以后写代码,必须在主启动类的同包及子包中编辑.

3.4.3 入门案例
//历史: 后端进行页面跳转时一般使用Controller注解
//当下: 前后端分离, 页面不归后端管理,RestController
//     RestController = Controller + @ResponseBody
//面试题: @Controller 和 @RestController
//@Controller
//@ResponseBody
@RestController
public class HelloController {

    /*该注解与方法绑定 */
    @RequestMapping("/hello")
    public String hello(){

        return "您好SpringBoot";
    }
}
3.4 为属性赋值
3.4.1 业务需求
说明: 如果将数据写死在java文件中,如果数据发生变化,则需要手动的修改.java文件. 如果以后有大量的需求,则扩展不方便
解决方案: 动态为属性赋值.

3.4.2 YML方式为属性赋值
3.4.2.1 定义属性

3.4.2.2 定义属性
package com.jt.controller;

import org.springframework.beans.factory.annotation.Value;
import org.springframework.stereotype.Controller;
import org.springframework.web.bind.annotation.RequestMapping;
import org.springframework.web.bind.annotation.ResponseBody;
import org.springframework.web.bind.annotation.RestController;
//历史: 后端进行页面跳转时一般使用Controller注解
//当下: 前后端分离, 页面不归后端管理,RestController
//     RestController = Controller + @ResponseBody
//面试题: @Controller 和 @RestController
//@Controller
//@ResponseBody
@RestController
public class HelloController {

    //private String name = "李四";
    /**
     * 表达式: springel表达式 简称为spel表达式
     * 语法:  ${表达式内容}
     * 工作原理:
     *      容器: 在内存中一个存储大量数据的Map集合
     *      1.当SpringBoot程序启动时,首先加载application.yml的配置文件
     *      2.当程序加载key-value结构时,将数据保存到Map集合中(容器内部)
     *      3.利用Spel表达式,通过key,获取value,之后为属性赋值.
     */
    @Value("${userinfo.name}")
    private String name;

    /*该注解与方法绑定 */
    @RequestMapping("/hello")
    public String hello(){

        return "您好SpringBoot:"+name;
    }
}
3.5 pro属性赋值
3.5.1 YML文件相关说明
YML文件的主要作用: 编辑SpringBoot与第三方框架的整合.
如果将大量的业务数据都写到YML文件中,则会造成业务与框架的耦合.不方便管理.
想法: 能否优化业务数据.让代码整洁.
实现策略: 通过properties的配置文件实现业务的解耦.
3.5.2 编辑pro配置文件

3.5.3 实现数据注入
- 类中的注解

- 为属性赋值

B站地址:

本文由 liyunfei 创作,采用 知识共享署名4.0
国际许可协议进行许可
本站文章除注明转载/出处外,均为本站原创或翻译,转载前请务必署名
最后编辑时间为: Jul 21,2022