
介绍
我们在上节已经初步尝试了 Spring Security 安全认证的使用,但是对它具体的认证过程还不甚了解。本节我们将会学习 Spring Security 安全认证过程中,用户信息获取和逻辑校验的处理方式。
上节代码下载地址为:https://labfile.oss.aliyuncs.com/courses/3013/code1.zip
知识点
- 用户认证逻辑
- 自定义登录流程
- 登录成功处理器
用户认证逻辑
要进行用户认证,自然就要先获取到用户的验证信息。Spring Security 提供了 UserDetailsService 接口来获取用户信息。该接口用于加载用户特定的数据,它在整个框架中作为用户 DAO 使用。该接口只需要一个只读方法,这简化了对新的数据访问策略的支持。下面来实现一个自定义的 UserDetailsService (本节所有代码在上节的基础上进行)。
hello_security/src/main/java/com/shiyanlou/MyUserDetailsService.java
package com.shiyanlou;

import org.springframework.security.core.authority.AuthorityUtils;
import org.springframework.security.core.userdetails.User;
import org.springframework.security.core.userdetails.UserDetails;
import org.springframework.security.core.userdetails.UserDetailsService;
import org.springframework.security.core.userdetails.UsernameNotFoundException;
import org.springframework.stereotype.Component;

/**
 自定义数据源来获取数据
 这里只要是存在一个自定义的 UserDetailsService,那么 security 将会使用该实例进行配置
 */
@Component
public class MyUserDetailsService implements UserDetailsService {


    // 可以从任何地方获取数据
    @Override
    public UserDetails loadUserByUsername(String username) throws UsernameNotFoundException {

        System.out.println("获取到的用户信息:" + username);

        // 写死一个密码,赋予一个 admin 权限【正常应该是在数据库中查询出来】
        return new User(username, "123456",
                AuthorityUtils.commaSeparatedStringToAuthorityList("admin"));
    }
}
这样就能让自定义的 UserdetailsService 生效了,等会我们会在这里拿到用户数据。不过上一节中,为了测试,我们将用户设置在了内存中(com.shiyanlou.WebSecurityConfig#configureGlobal)。这里要把这段代码去掉:
hello_security/src/main/java/com/shiyanlou/WebSecurityConfig.java
public class WebSecurityConfig extends WebSecurityConfigurerAdapter {
    // @Autowired
    // public void configureGlobal(AuthenticationManagerBuilder auth) throws Exception {
    //     auth
    //             .inMemoryAuthentication()
    //             .passwordEncoder(new BCryptPasswordEncoder())
    //             .withUser("user")
    //             .password(new BCryptPasswordEncoder().encode("123456"))
    //             .roles("USER");
    // }
}
然后重启项目,然后登录时报错:
java.lang.IllegalArgumentException: There is no PasswordEncoder mapped for the id "null"
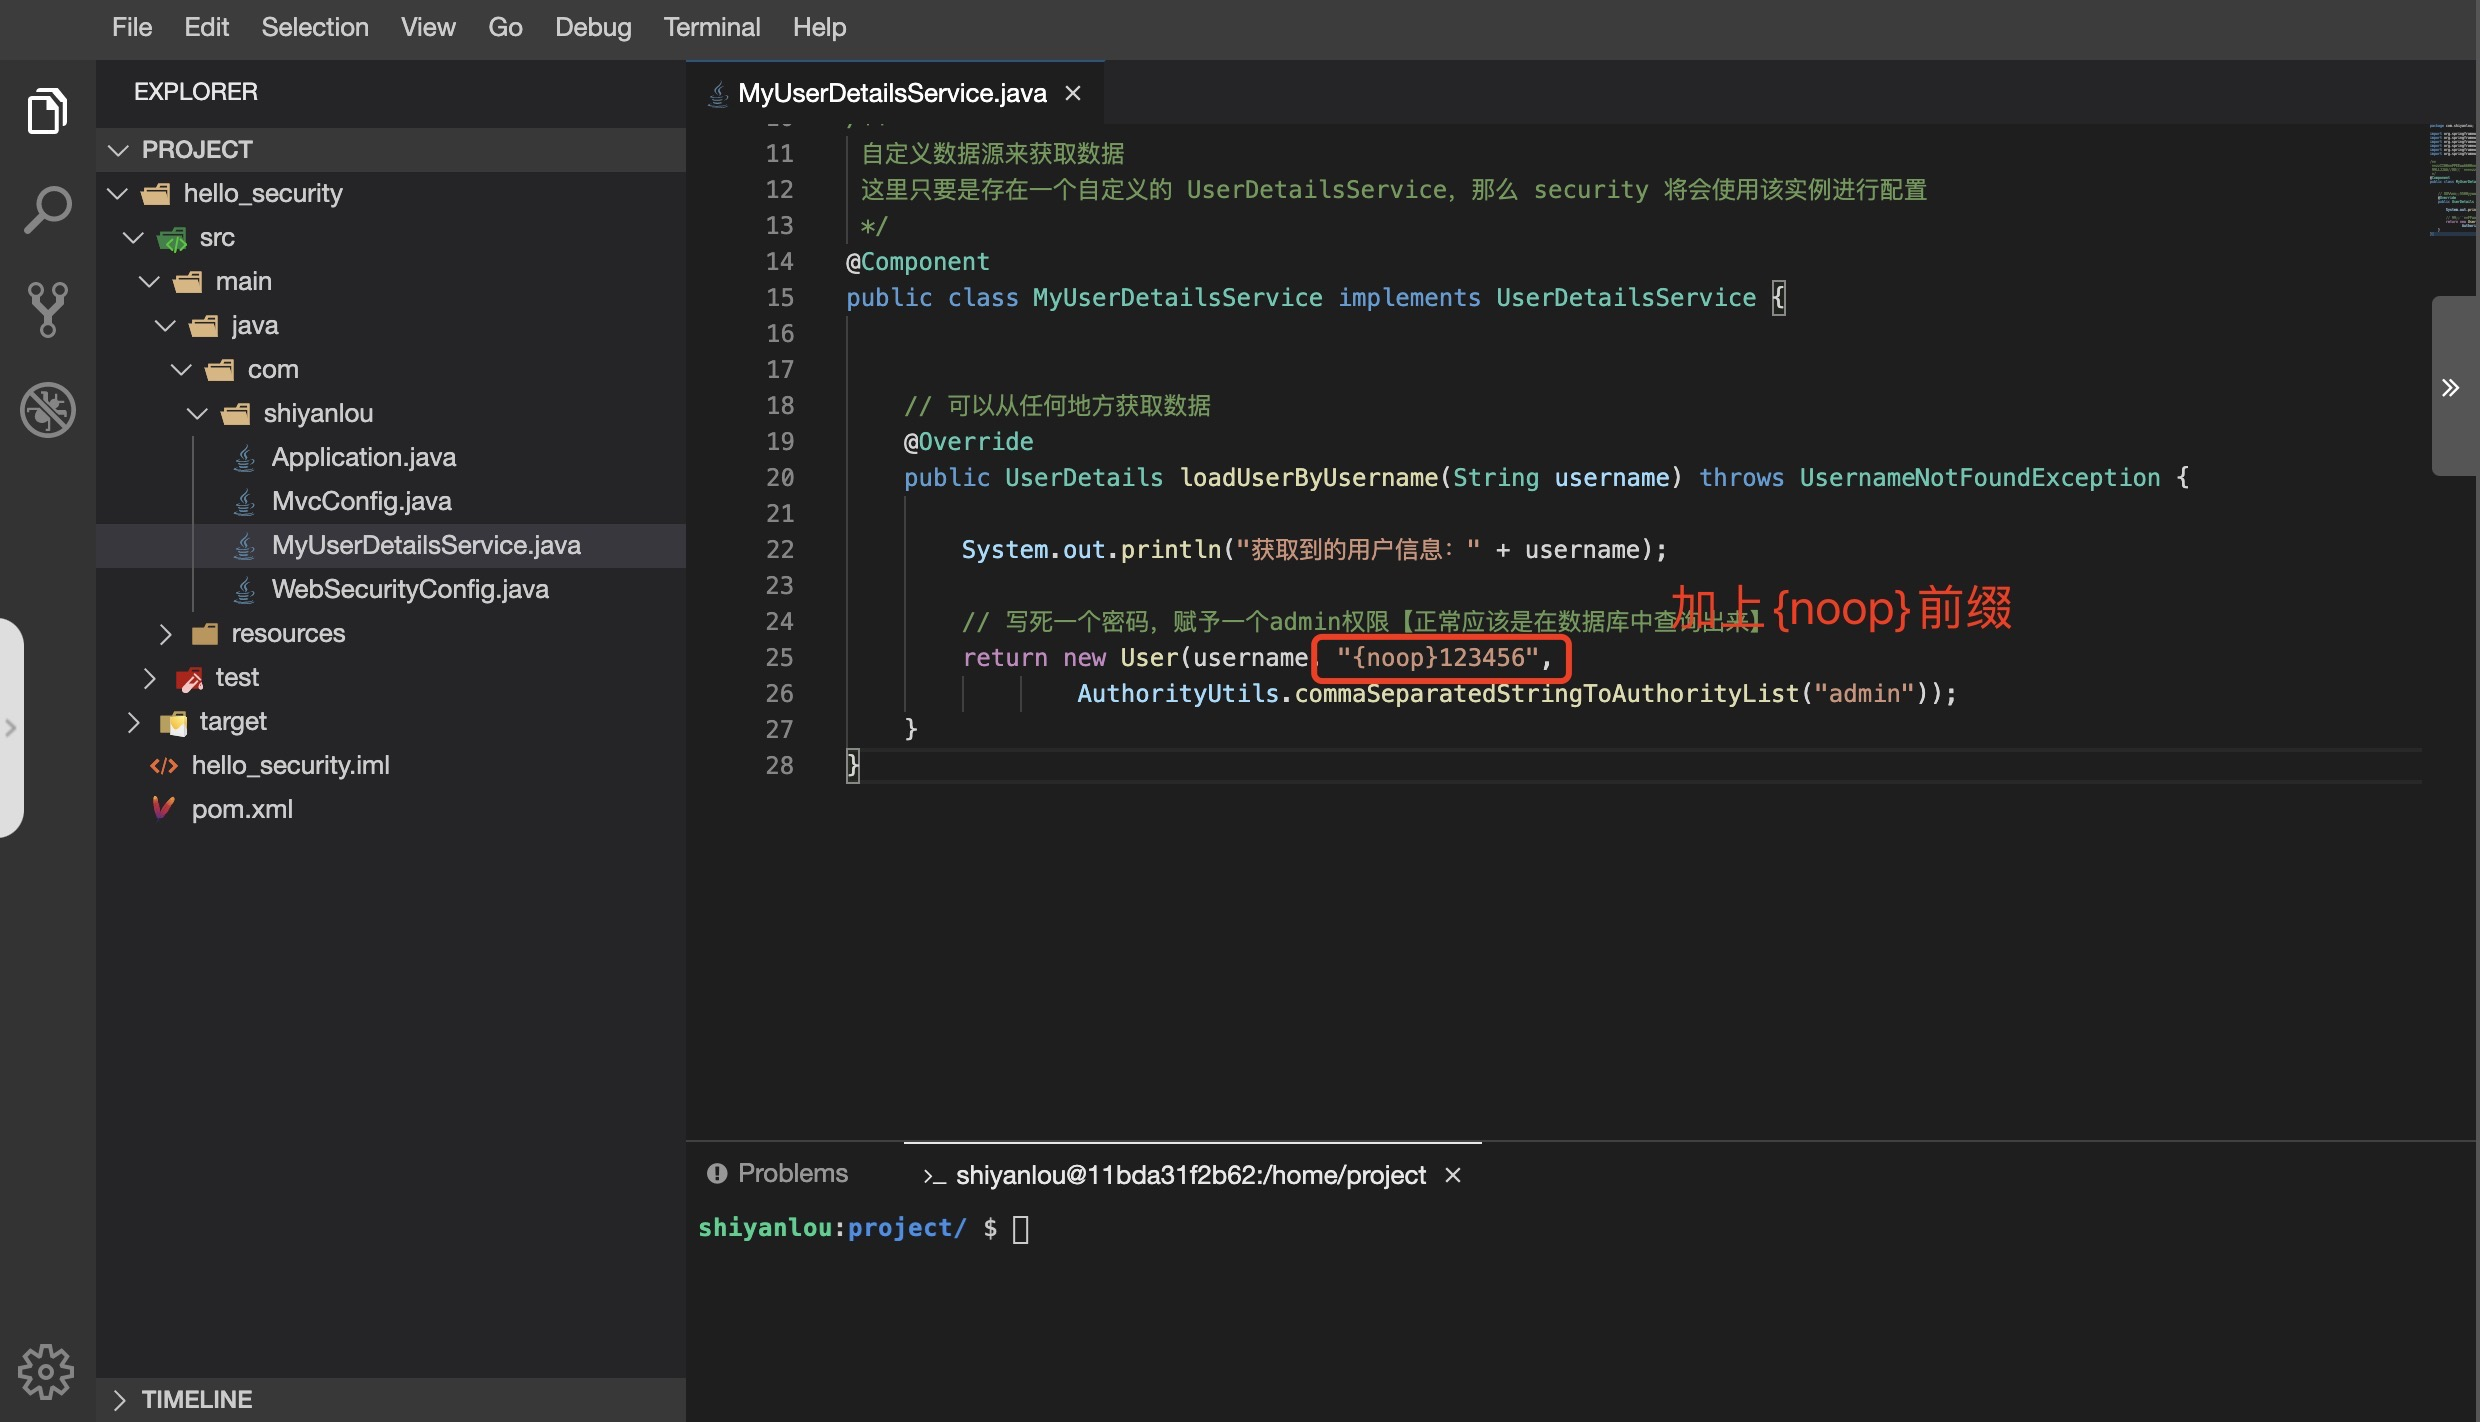
这个异常是 Spring Security 5+ 后密码策略变更了。必须使用 PasswordEncoder 方式,也就是你存储密码的时候需要使用 {noop}123456 这样的方式。这个在官网文档中有讲到,花括号里面的是 encoder id,这个支持的全部列表在以下的方法中定义:
org.springframework.security.crypto.factory.PasswordEncoderFactories#createDelegatingPasswordEncoder
noop 对应的处理类是 org.springframework.security.crypto.password.NoOpPasswordEncoder,只用于测试,因为没有做任何加密功能。
我们没有做用户的信息校验,只要密码输入为 123456 即可。下面看看效果:
密码加解密处理
上面为了测试方便,采用的是密码非加密的方式,但是在实际应用中,用户密码都是要进行加密处理的。密码加解密使用了下面这个类:
org.springframework.security.crypto.password.PasswordEncoder
要想使用,只需要提供一个实例即可,我们加到 WebSecurityConfig 类中去:
hello_security/src/main/java/com/shiyanlou/WebSecurityConfig.java
import org.springframework.security.crypto.bcrypt.BCryptPasswordEncoder;
import org.springframework.security.crypto.password.PasswordEncoder;
import org.springframework.context.annotation.Bean;

@Bean
public PasswordEncoder passwordEncoder() {
    return new BCryptPasswordEncoder();
}
这样在 MyUserDetailsService 中需要提供的密码就是加密后的字符串:
hello_security/src/main/java/com/shiyanlou/MyUserDetailsService.java
import org.springframework.beans.factory.annotation.Autowired;
import org.springframework.security.crypto.password.PasswordEncoder;

public class MyUserDetailsService implements UserDetailsService {

    @Autowired
    private PasswordEncoder passwordEncoder;

    // 可以从任何地方获取数据
    @Override
    public UserDetails loadUserByUsername(String username) throws UsernameNotFoundException {

        System.out.println("获取到的用户信息:" + username);


        String password = passwordEncoder.encode("123456");

        return new User(username,
                // "{noop}123456",
                password,
                AuthorityUtils.commaSeparatedStringToAuthorityList("admin"));
    }
}
其框架会把提交的密码使用我们定义的 passwordEncode 加密后调用 org.springframework.security.crypto.password.PasswordEncoder#matches 方法,与返回的 User 中的密码进行比对,配对正常就验证通过。效果和上面一样。
处理不同类型的请求
我们上面需要登录验证时都是统一跳转到了一个登录 html 页面上去,但是,在前后分离的情况下,都用 Ajax 来请求,肯定不能返回 html 了,一般都是给前端一个 JSON 串,让前端人员去判断处理。那么要怎么实现根据请求来判断是返回 html 内容,还是 JSON 内容呢?
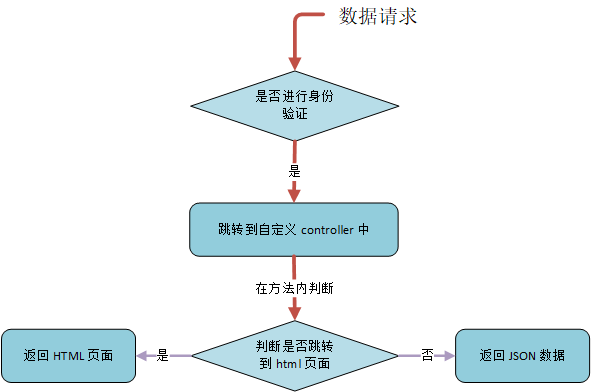
思路很简单,身份验证后,不再直接跳转到页面,而是跳转到 Controller 中。然后在 Controller 中就可以自己决定后续的处理逻辑。
hello_security/src/main/java/com/shiyanlou/WebSecurityConfig.java
protected void configure(HttpSecurity http) throws Exception {
    http
        .authorizeRequests()
        // 放过 /login
        .antMatchers("/", "/home", "/login").permitAll()
        .anyRequest().authenticated()
        .and()
        .formLogin()
        // .loginPage("/login")
        // 更换成自定义的一个真实存在的处理器地址
        .loginPage("/authentication/require")
        .permitAll()
        .and()
        .logout()
        .permitAll();
}
然后实现自定义的 Controller 处理器即可。不过在处理之前,我们先在 pom.xml 中再引入一些我们后续需要的依赖:
hello_security/pom.xml
<!--json 相关依赖-->
<dependency>
    <groupId>com.fasterxml.jackson.core</groupId>
    <artifactId>jackson-databind</artifactId>
</dependency>

<dependency>
    <groupId>com.alibaba</groupId>
    <artifactId>fastjson</artifactId>
    <version>1.2.49</version>
</dependency>

<!--lombok 组件-->
<dependency>
    <groupId>org.projectlombok</groupId>
    <artifactId>lombok</artifactId>
    <version>1.18.0</version>
</dependency>
然后弄一个自定义响应体,默认状态码为 200:
hello_security/src/main/java/com/shiyanlou/RestResult.java
package com.shiyanlou;

import com.fasterxml.jackson.databind.JsonNode;
import com.fasterxml.jackson.databind.ObjectMapper;
import java.util.List;

public class RestResult {

    // 定义 jackson 对象
    private static final ObjectMapper MAPPER = new ObjectMapper();
    // 响应业务状态
    private String status;
    // 响应消息
    private String msg;
    // 响应中的数据
    private Object data;

    public static RestResult build(String status, String msg, Object data) {
        return new RestResult(status, msg, data);
    }


    public static RestResult ok(Object data) {
        return new RestResult(data);
    }

    public static RestResult ok() {
        return new RestResult(null);
    }

    public RestResult() {

    }

    public static RestResult build(String status, String msg) {
        return new RestResult(status, msg, null);
    }

    public RestResult(String status, String msg, Object data) {
        this.status = status;
        this.msg = msg;
        this.data = data;
    }

    public RestResult(Object data) {
        this.status = "200";
        this.msg = "OK";
        this.data = data;
    }

    public Boolean isOK() {
        return this.status == "200";
    }

    /*
     * 功能描述:将 json 结果集转化为 RestResult 对象
     */
    public static RestResult formatToPojo(String jsonData, Class<?> clazz) {


        try {
            if (clazz == null) {
                return MAPPER.readValue(jsonData, RestResult.class);
            }
            JsonNode jsonNode = MAPPER.readTree(jsonData);
            JsonNode data = jsonNode.get("data");
            Object obj = null;
            if (clazz != null) {
                if (data.isObject()) {
                    obj = MAPPER.readValue(data.traverse(), clazz);
                } else if (data.isTextual()) {
                    obj = MAPPER.readValue(data.asText(), clazz);
                }
            }
            return build(jsonNode.get("status").asText(), jsonNode.get("msg").asText(), obj);
        } catch (Exception e) {
            return null;
        }
    }

    /*
     * 功能描述:没有 object 对象的转化
     */
    public static RestResult format(String json) {
        try {
            return MAPPER.readValue(json, RestResult.class);
        } catch (Exception e) {
            e.printStackTrace();
        }
        return null;
    }

    /*
     * 功能描述:Object 是集合转化
     */
    public static RestResult formatToList(String jsonData, Class<?> clazz) {
        try {
            JsonNode jsonNode = MAPPER.readTree(jsonData);
            JsonNode data = jsonNode.get("data");
            Object obj = null;
            if (data.isArray() && data.size() > 0) {
                obj = MAPPER.readValue(data.traverse(),
                        MAPPER.getTypeFactory().constructCollectionType(List.class, clazz));
            }
            return build(jsonNode.get("status").asText(), jsonNode.get("msg").asText(), obj);
        } catch (Exception e) {
            return null;
        }
    }

    public String getStatus() {
        return status;
    }

    public void setStatus(String status) {
        this.status = status;
    }

    public String getMsg() {
        return msg;
    }

    public void setMsg(String msg) {
        this.msg = msg;
    }

    public Object getData() {
        return data;
    }

    public void setData(Object data) {
        this.data = data;
    }

}
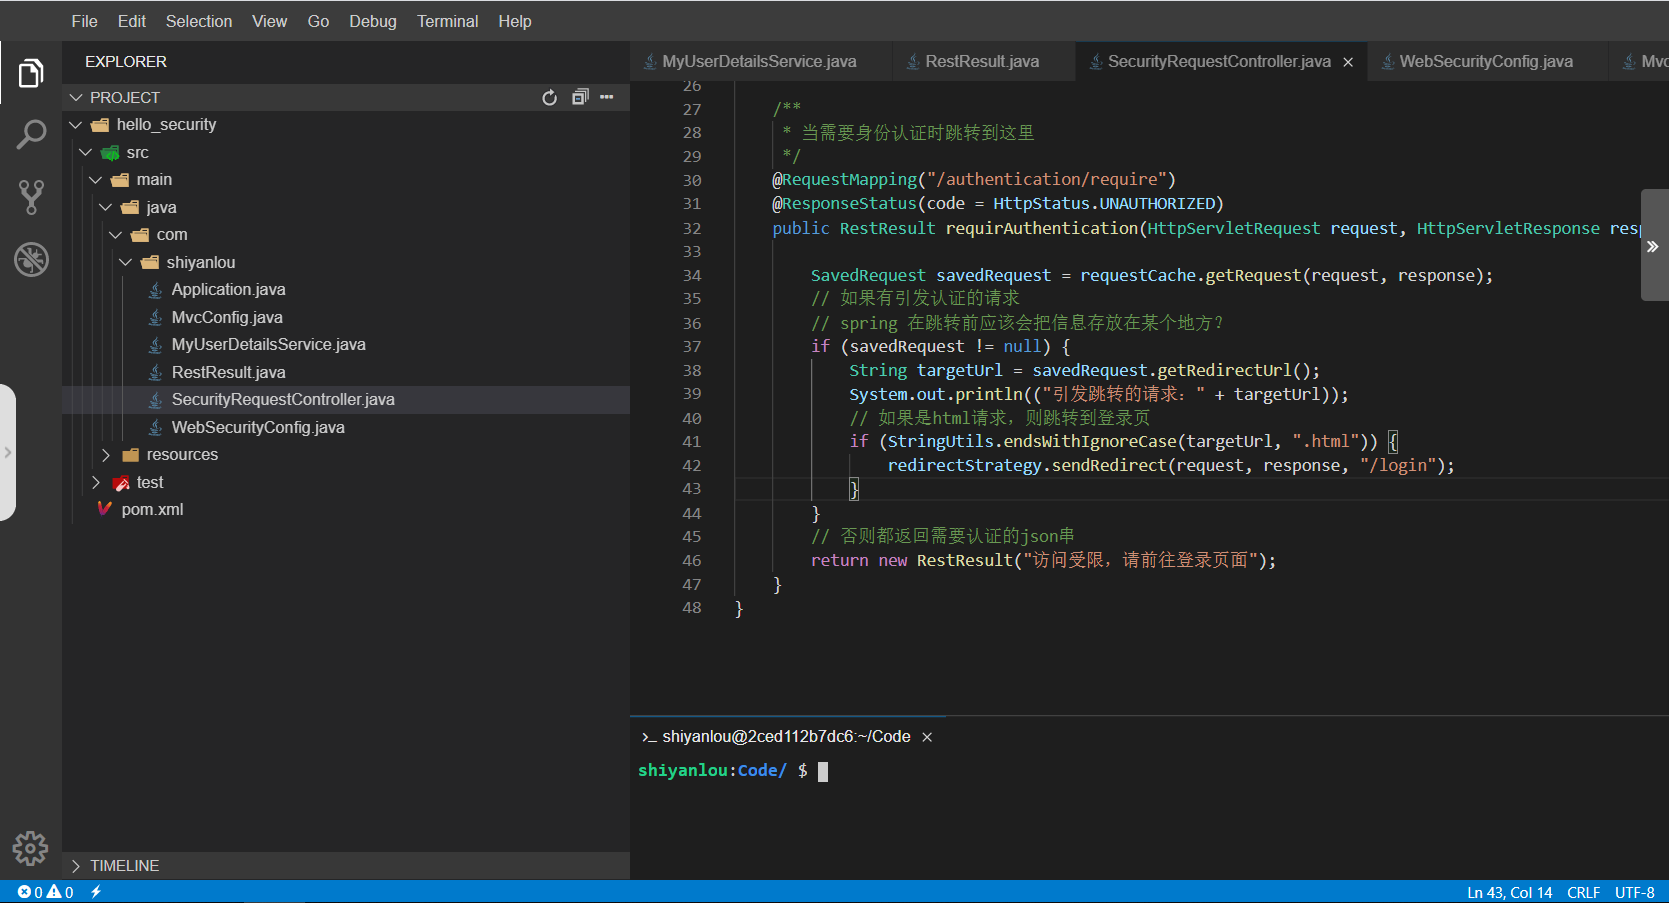
下面开始控制器的编写:
hello_security/src/main/java/com/shiyanlou/SecurityRequestController.java
package com.shiyanlou;

import org.springframework.http.HttpStatus;
import org.springframework.security.web.DefaultRedirectStrategy;
import org.springframework.security.web.RedirectStrategy;
import org.springframework.security.web.savedrequest.HttpSessionRequestCache;
import org.springframework.security.web.savedrequest.RequestCache;
import org.springframework.security.web.savedrequest.SavedRequest;
import org.springframework.util.StringUtils;
import org.springframework.web.bind.annotation.RequestMapping;
import org.springframework.web.bind.annotation.ResponseStatus;
import org.springframework.web.bind.annotation.RestController;

import javax.servlet.http.HttpServletRequest;
import javax.servlet.http.HttpServletResponse;
import java.io.IOException;

@RestController
public class SecurityRequestController {
    // 封装了引发跳转请求的工具类,看实现类应该是从 session 中获取的
    private RequestCache requestCache = new HttpSessionRequestCache();

    // spring 的工具类:封装了所有跳转行为策略类
    private RedirectStrategy redirectStrategy = new DefaultRedirectStrategy();

    /**
     * 当需要身份认证时跳转到这里
     */
    @RequestMapping("/authentication/require")
    @ResponseStatus(code = HttpStatus.UNAUTHORIZED)
    public RestResult requirAuthentication(HttpServletRequest request, HttpServletResponse response) throws IOException {

        SavedRequest savedRequest = requestCache.getRequest(request, response);
        // 如果有引发认证的请求
        if (savedRequest != null) {
            String targetUrl = savedRequest.getRedirectUrl();
            System.out.println(("引发跳转的请求:" + targetUrl));
            // 如果是 html 请求,则跳转到登录页
            if (StringUtils.endsWithIgnoreCase(targetUrl, ".html")) {
                redirectStrategy.sendRedirect(request, response, "/login");
            }
        }
        // 否则都返回需要认证的 json 串
        return new RestResult("访问受限,请前往登录页面");
    }
}
这块具体逻辑怎么实现,要根据业务的具体情况,这里我们先假设,如果是通过 .html 后缀访问的都引导到登录页面,如果不是,则默认返回一个 JSON 串。为了测试通过,最后调整两个地方:
hello_security/src/main/resources/templates/home.html
<body>
  <!-- 这里加上 .html 后缀 -->
  <p>Click <a th:href="@{/hello.html}">here</a> to see a greeting.</p>
</body>
hello_security/src/main/java/com/shiyanlou/MvcConfig.java
@Configuration
public class MvcConfig implements WebMvcConfigurer {

    public void addViewControllers(ViewControllerRegistry registry) {
        // 对应加上 .html 后缀
        registry.addViewController("/hello.html").setViewName("hello");
    }
}
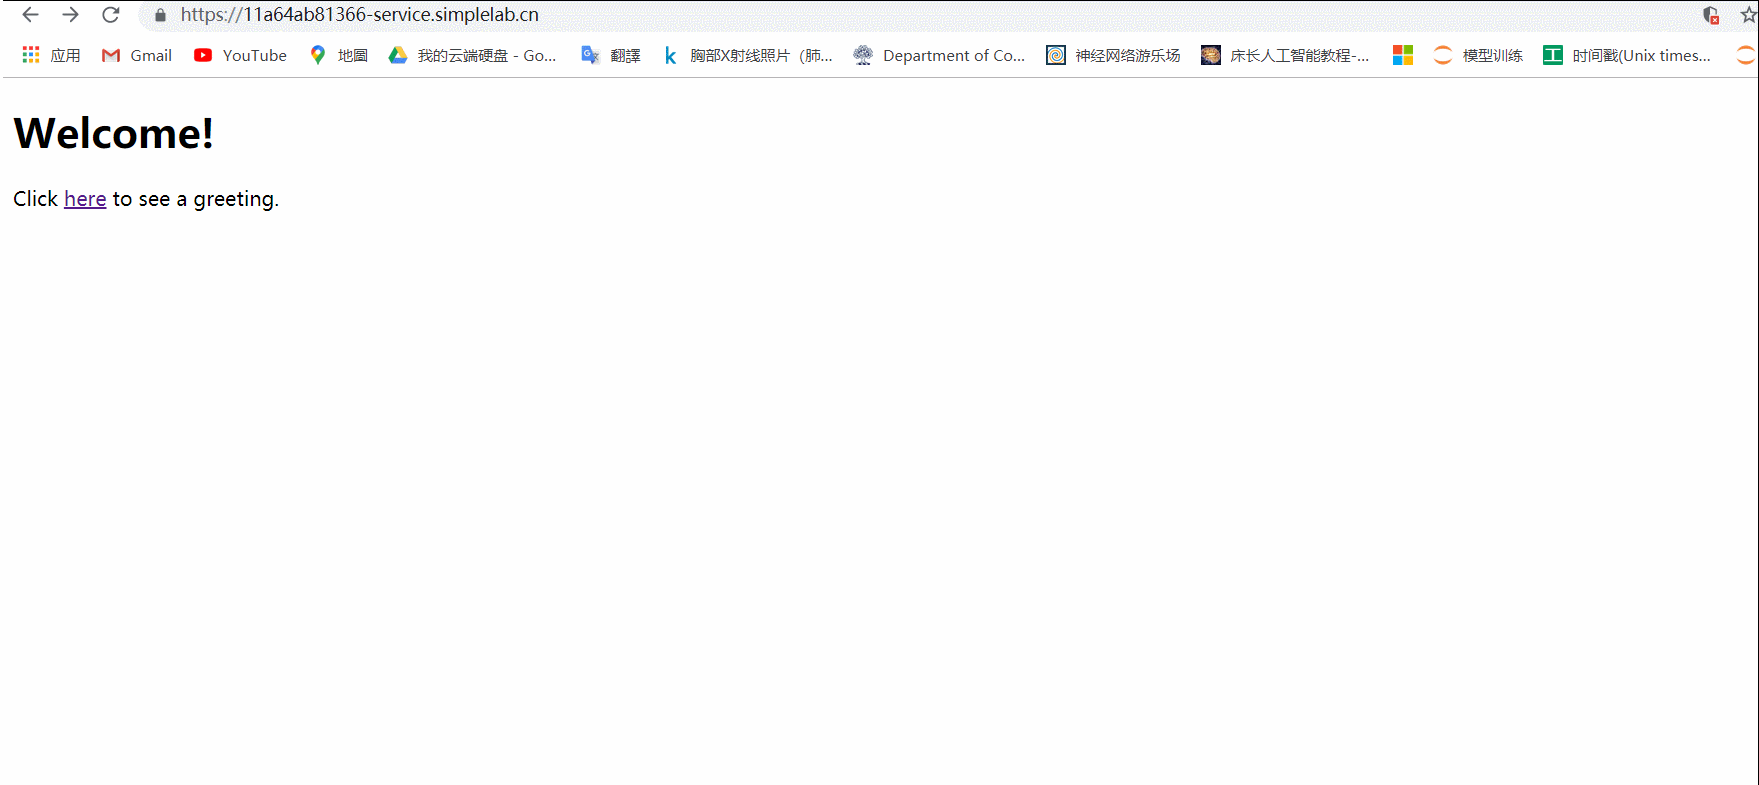
下面启动程序测试,先看看由页面引起的跳转测试:
正常能跳转到 html 页面,然后我们再模拟一下表单请求,这里我们使用一个谷歌浏览器的 Postman 插件,Postman 是一款功能强大的网页调试与发送网页 HTTP 请求的 Chrome 插件。如果可以打开谷歌商店,可以直接在谷歌商店搜索即可。
如果无法访问,可以选择离线安装,从该地址下载下来安装插件:https://labfile.oss.aliyuncs.com/courses/3013/postman.zip ,解压后,在谷歌浏览器菜单栏找到扩展程序,然后选择 加载已解压的扩展程序 即可。
下面看一下请求结果:
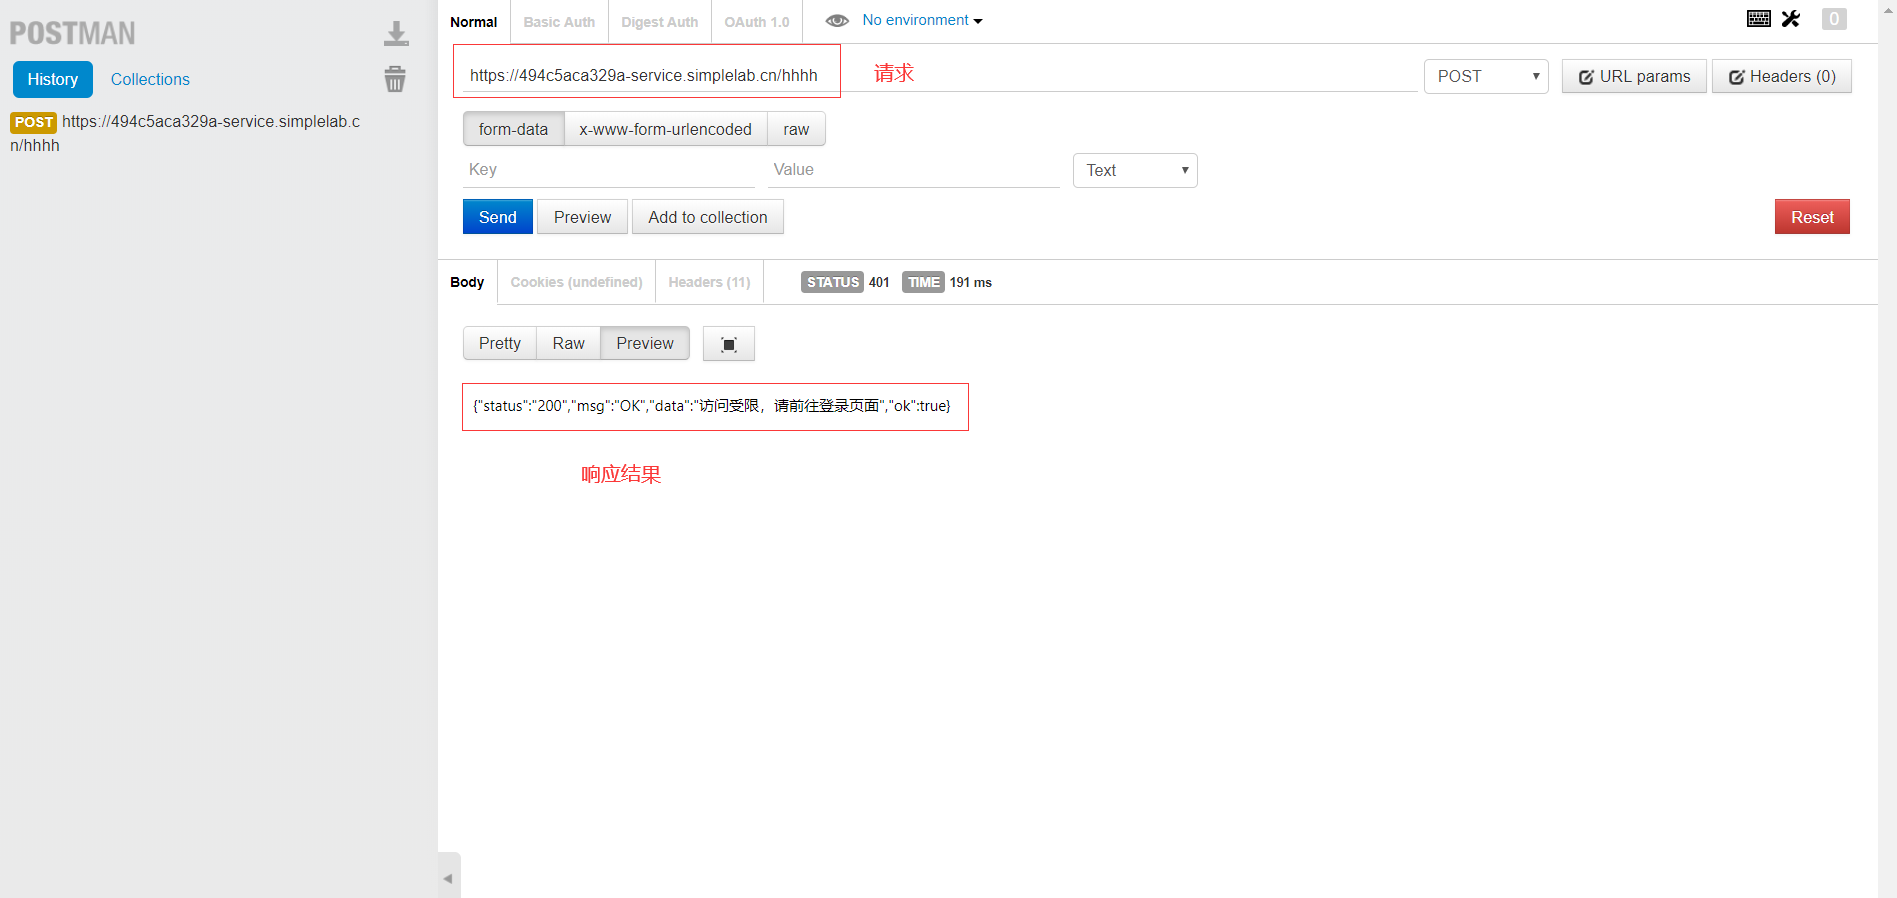
功能完成。
登录成功后的处理
和上面同样的,关于 Ajax 请求,登录成功后也会面临不应该直接返回页面的情况。所以登录成功后我们也要进行额外处理,登录成功则返回相关的数据即可。自定义入口还是在表单登录处配置的:
hello_security/src/main/java/com/shiyanlou/WebSecurityConfig.java
package com.shiyanlou;

import org.springframework.beans.factory.annotation.Autowired;
import org.springframework.context.annotation.Bean;
import org.springframework.context.annotation.Configuration;
import org.springframework.security.config.annotation.authentication.builders.AuthenticationManagerBuilder;
import org.springframework.security.config.annotation.web.builders.HttpSecurity;
import org.springframework.security.config.annotation.web.configuration.EnableWebSecurity;
import org.springframework.security.config.annotation.web.configuration.WebSecurityConfigurerAdapter;
import org.springframework.security.crypto.bcrypt.BCryptPasswordEncoder;
import org.springframework.security.crypto.password.PasswordEncoder;

/**
 * spring security 安全配置项
 */
@Configuration
@EnableWebSecurity
public class WebSecurityConfig extends WebSecurityConfigurerAdapter {

    @Autowired
    private MyAuthenticationSuccessHandler myAuthenticationSuccessHandler;

    @Override
    protected void configure(HttpSecurity http) throws Exception {
        http
                .authorizeRequests()
                // 放过 /login 表单认证相关
                .antMatchers( "/authentication/*", "/", "/home", "/login").permitAll()
                .anyRequest().authenticated()
                .and()
                .formLogin()
                // .loginPage("/login")
                // 更换成自定义的一个真实存在的处理器地址
                .loginPage("/authentication/require")
                .loginProcessingUrl("/authentication/form")
                // 加入自定义处理器
                .successHandler(myAuthenticationSuccessHandler)
                .permitAll()
                .and()
                // csrf 防护关掉
                .csrf().disable()
                .logout()
                .permitAll();
    }


    @Bean
    public PasswordEncoder passwordEncoder() {
        return new BCryptPasswordEncoder();
    }


//    @Autowired
//    public void configureGlobal(AuthenticationManagerBuilder auth) throws Exception {
//        auth
//                .inMemoryAuthentication()
//                .passwordEncoder(new BCryptPasswordEncoder())
//                .withUser("user")
//                .password(new BCryptPasswordEncoder().encode("123456"))
//                .roles("USER");
//    }
}
现在就写好上面代码提到的自定义处理器即可,回顾下我们的目的:如果 Ajax 访问返回 JSON 数据;在普通处理下跳转到之前访问的 URL。我们把两种情况都实现一下,到时候具体需要哪种处理方式直接切换即可:
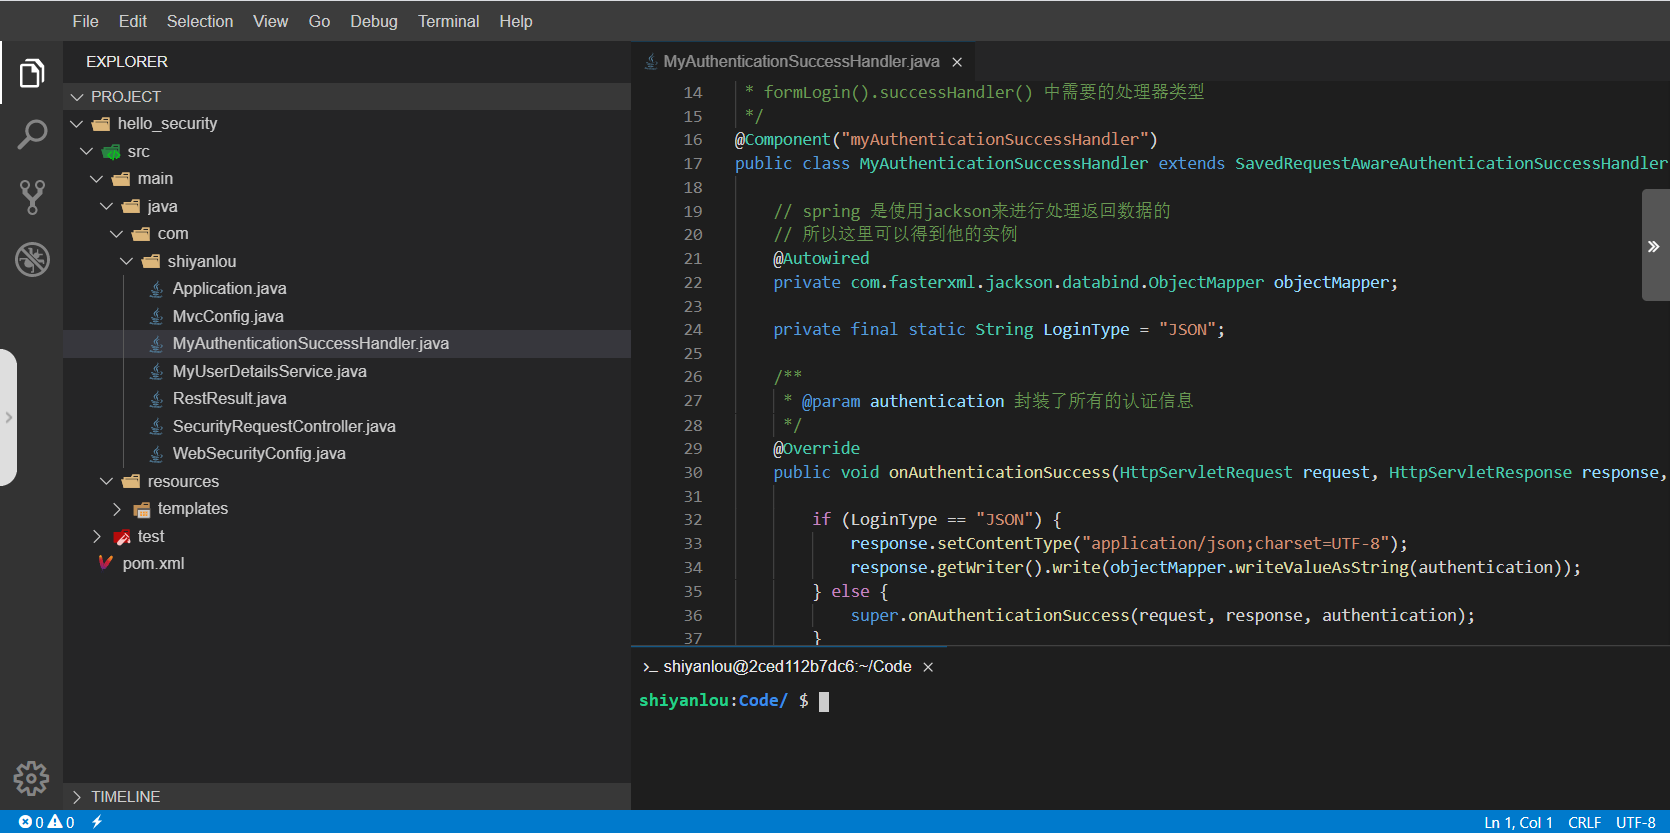
hello_security/src/main/java/com/shiyanlou/MyAuthenticationSuccessHandler.java
package com.shiyanlou;

import org.springframework.beans.factory.annotation.Autowired;
import org.springframework.security.core.Authentication;
import org.springframework.security.web.authentication.SavedRequestAwareAuthenticationSuccessHandler;
import org.springframework.stereotype.Component;

import javax.servlet.ServletException;
import javax.servlet.http.HttpServletRequest;
import javax.servlet.http.HttpServletResponse;
import java.io.IOException;

/**
 * formLogin().successHandler() 中需要的处理器类型
 */
@Component("myAuthenticationSuccessHandler")
public class MyAuthenticationSuccessHandler extends SavedRequestAwareAuthenticationSuccessHandler {

    // spring 是使用jackson来进行处理返回数据的
    // 所以这里可以得到他的实例
    @Autowired
    private com.fasterxml.jackson.databind.ObjectMapper objectMapper;

    private final static String LoginType = "JSON";

    /**
     * @param authentication 封装了所有的认证信息
     */
    @Override
    public void onAuthenticationSuccess(HttpServletRequest request, HttpServletResponse response, Authentication authentication) throws IOException, ServletException {

        if (LoginType == "JSON") {
            response.setContentType("application/json;charset=UTF-8");
            response.getWriter().write(objectMapper.writeValueAsString(authentication));
        } else {
            super.onAuthenticationSuccess(request, response, authentication);
        }
    }
}
这样登录成功处理器就 ok 了。对于登录失败的处理器来说也是一样的,这里实现暂时没什么意义,后面再说。下面就可以启动项目进行测试喽,看效果(后面为了符合目前前后端开发的真实环境,尽量测试都在 postman 上进行):

返回过来的 JSON 字符串包含了我们需要的所有用户相关信息:
{
  "authorities": [
    {
      "authority": "admin"
    }
  ],
  "details": {
    "remoteAddress": "172.16.2.250",
    "sessionId": null
  },
  "authenticated": true,
  "principal": {
    "password": null,
    "username": "user",
    "authorities": [
      {
        "authority": "admin"
      }
    ],
    "accountNonExpired": true,
    "accountNonLocked": true,
    "credentialsNonExpired": true,
    "enabled": true
  },
  "credentials": null,
  "name": "user"
}
总结
到此为止,Spring Security 的基本认证过程就实现了。我们先讲了用户认证的处理逻辑,然后再讲了不同类型的请求执行不同的认证处理,最后又自定义了一个登录成功处理器。前两节主要是对 Spring Security 框架的一个入门使用,后面再逐渐集成到较真实的应用场景中去。
本节代码下载地址为:https://labfile.oss.aliyuncs.com/courses/3013/code2.zip
其他实验
实验三:Spring Security 中自定义过滤器
知识点: 1.maven项目拆分 2.配置信息抽取 3.自定义过滤器链 4.验证码校验逻辑
https://labfile.oss.aliyuncs.com/courses/3013/code3.zip
实验四:短信验证码登陆实现
知识点: 1.自定义Token令牌 2.自定义SpringSecurity处理器 3.UserDetailService接口扩展
https://labfile.oss.aliyuncs.com/courses/3013/code4.zip
实验五:Session 管理
知识点: 1.Session超时设置 2.Session并发控制 3.集群Session管理
https://labfile.oss.aliyuncs.com/courses/3013/code5.zip
实验六:Spring Security OAuth 介绍
知识点: 1.认证服务器 2.资源服务器 3.令牌刷新
https://labfile.oss.aliyuncs.com/courses/3013/code6.zip
实验 7基于 OAuth 对代码进行重构
知识点: 1.基于Token实现表单登录 2.基于Token实现短信登录 3.授权管理配置
https://labfile.oss.aliyuncs.com/courses/3013/code7.zip
实验 8令牌配置
知识点: 1.Token储存方式 2.JWT基本使用 3.JWT解析
https://labfile.oss.aliyuncs.com/courses/3013/code8.zip
实验 9Spring Security 控制授权
知识点: 1.简单权限控制 2.权限表达式 3.基于数据库模型实现控制权限
https://labfile.oss.aliyuncs.com/courses/3013/code9.zip
实验 10基于 Spring Security 实现单点登录
知识点: 1.SSO认证服务器 2.SSO单点登录实现 3.SSO自定义登录流程
https://labfile.oss.aliyuncs.com/courses/3013/code10.zip
也可参见仓库:
本文由 liyunfei 创作,采用 知识共享署名4.0
国际许可协议进行许可
本站文章除注明转载/出处外,均为本站原创或翻译,转载前请务必署名
最后编辑时间为: Jul 26,2022